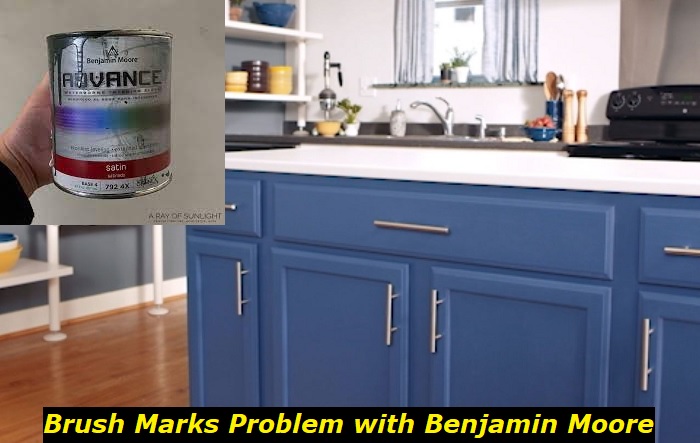
There are a few things worse than ruining a project you’ve worked hard on with brush marks. If you’ve put several hours into your work making sure to get everything just right, streaky paint is enough to make your project feel shoddy or badly made. You could try to fix this by using higher-quality paint, like Benjamin Moore Advance, but you might be surprised (and frustrated) to find out that you still have brush marks.
Benjamin Moore Advance is less likely to leave you with brush marks and streaks, but that doesn’t mean it can’t happen. Accidents happen, and sometimes the paint still comes through with brush marks, ropes, or streaks. Fortunately, you can prevent or fix these if you use the right techniques or tools.
If you’re tired of streaky paint and visible paint marks, we’ll walk you through what you can do to avoid this. We’ll also let you know what you can do to fix any brush marks that might already be on your project.
How to Prevent Brush Marks with Benjamin Moore Advance?
Benjamin Moore Advance paint is a high-quality paint that’s respected by craftsmen all over the world for its professional, durable finish. Many craftsmen and hobbyists use it to eliminate brush marks from their work, but even the highest quality paints can leave brush marks if you don’t use them right.
1) Use a High-Quality Brush
Benjamin Moore Advance is a high-quality paint, but it’s only one part of the equation. The brush you use is often just as important as your paint.
Cheap brushes have hard bristles. Hard brushes push and scrape the paint around on the wood surface, rather than smoothing it around to create an even coat. When this happens you’ll end up with streaks and visible brush marks from the paint building up unevenly.
Invest in some high-quality brushes instead. Sure, you’ll end up spending a bit more, but the softer bristles will apply the paint more evenly, giving you a smooth coat every time. It’s definitely worth it.
2) Let the Paint Dry Properly Between Coats
Using multiple coats is a great way to achieve a full, rich finish. Multiple coats also help to prevent visible brush marks in your paint by increasing the thickness of the paint on the wood, giving you a smoother even finish. But using multiple coats the wrong way can actually worsen your brush mark problem.
Once you’ve laid down a coat, you need to wait for it to dry completely before starting on the next one. If the previous coat is still wet while you go over it with another, your brush won’t be able to lay the paint down evenly. This will leave raised ridges and brush marks in the paint. There’s also a good chance your paint will end up peeling or cracking.
Some painters will wait until the first coat feels dry before applying the next one. While this is usually good advice, Benjamin Moore recommends waiting 16 hours between coats for the best results.
3) Sand Between Coats
This might be a bit of a time-consuming process, especially if you’re waiting 18 hours between coats, but you can’t argue with the results. Sanding the paint between each coat smooths it out and prevents brush strokes from building up.
4) Prep Your Painting Surface Properly
The surface you paint on is just as important as anything else in the painting process. Not all surfaces take paint in properly. Even wood, which usually accepts paint readily, still needs a bit of prep work to really hold onto it smoothly and evenly.
Sand the surface if necessary. You can’t get a smooth finish if you’re painting on a rough surface. Sanding the surface thoroughly to get rid of any roughness will instantly give you much better results.
You should definitely consider sanding if you’re repainting a piece that already has brush marks present. This will smooth out the paint and prevent the previous brush marks from showing through on the new paint.
Make sure the surface that you want to paint is clean and dry. Your paint won’t adhere properly if the surface isn’t clean. The cleaner the surface, the stronger the bond. Clean off any large debris like sawdust with a brush.
After cleaning off large debris, you need to get rid of any smaller dust that might be on the surface. Even small particles like dust or sand could ruin your coat and leave you with streaks in your finish. Use a cloth or rag to wipe down the surface and clean off any dust or smaller dirt that might be on it.
Once your surface is clean, make sure to prime it fully. Benjamin Moore Advance paint needs a well-primed surface to bond to. If you’re repainting a surface, you might be able to get away with just sanding and spot priming.
Finally, make sure the surface is perfectly dry before you attempt to paint it. If the wood is wet from any fluid, it will get between the paint and the surface, keeping them from bonding properly. This could cause the paint to peel later on.
5) Paint in the Direction of the Grain
The direction of your brush strokes is incredibly important, especially when you’re trying to prevent brush marks from showing up. It’s common knowledge that you should do your best to brush in a single direction when painting any surface. This allows the brush to distribute paint more smoothly.
It’s also important to stroke your brush in the direction of the wood grain whenever you can. This allows the paint on the bristles to move along the wood grain and adhere more strongly, promoting a more even and smoother finish. It also helps prevent the paint from running and pooling.
6) Use a Roller Instead of a Brush
The easiest way to eliminate brush marks is to switch out the brush for a paint roller. Paint rollers don’t have the same texture brushes do, so they put down paint in a smooth way with no marks.
Of course, a lot of painters prefer to use brushes over rollers, for a lot of different reasons. But if brush marks are vexing your painting efforts, then it’s worth giving rollers a try. Remember that brushes aren’t more or less professional than rollers. A true professional uses a variety of different tools and knows the right time to use them.
So of course, you shouldn’t just throw out all your brushes. Brushes perform a lot of important roles in painting that rollers simply can’t do – touching up, cutting in, and painting narrow surfaces.
What Can You Do About Brush Marks in Benjamin Moore Advance Paint?
Sometimes it’s too late to take precautions anymore. You might have used the wrong brush, or you might not have waited long enough between coats. Whatever the reason, you now have brush marks in your paint, and you’re wondering how to get rid of them.
First, let’s address a common mistake. Many painters will try to cover up their mistakes by painting over the brush marks with an additional coat. This works sometimes, but there’s such a thing as too many coats. Adding too many coats of paint leaves your paint prone to cracking and peeling down the line. Generally, you’re fine with attempting to cover brush marks with another coat of paint if you’ve only applied a single coat so far.
1) Run a Paint Roller Over the Affected Area
Even if you prefer to paint with a brush, a paint roller is a handy tool to have at the ready. A dry paint roller can easily help you redistribute paint if you accidentally get too much in one area. Going over the area again with a brush could leave more brush marks, but a paint roller simply smooths out the excess paint and eliminates marks.
2) Sand the Area and Repaint It
If you’ve got an area with some pretty bad brush marks, you can get rid of them with a thorough sanding. Sanding can help you get rid of the roughness of the brush strokes and remove any extra paint. This gives you a more even surface to touch up.
Just make sure not to over-sand the area, or you’ll get rid of all the paint and have to start over.
Conclusion
Benjamin Moore Advance is a high-quality paint that many painters pick to get rid of brush marks in their paint. However, as good as this paint is, you might still end up with brush marks if you don’t know the right painting techniques.
You can prevent brush marks and streaks from showing up in your paint by making sure your surface is well-prepared. This means cleaning, sanding, and priming the surface completely.
You can also prevent brush marks from building up by laying down your coats properly. First, use more than one coat, and make sure to let each coat dry completely before adding the next. You should also sand between coats to get rid of any brush texture from the previous coat.
- Can You Unmix Paint: Techniques, Consequences, Alternatives - February 23, 2024
- Does Primer Need to be Mixed? Effective Primer Application - February 22, 2024
- How to Make Old Paint Usable Again: Retrieving and Preserving Paint - February 21, 2024


