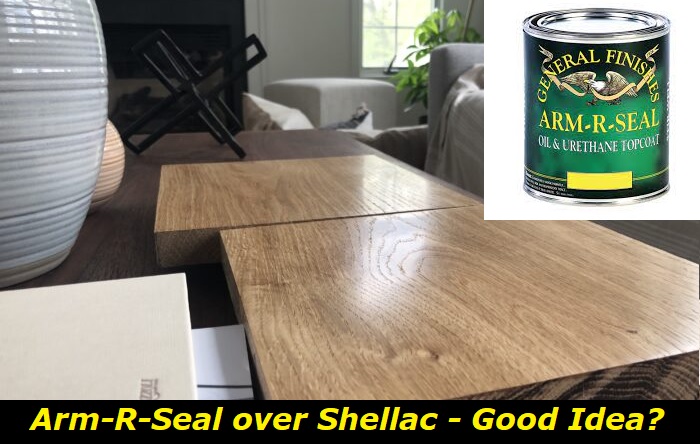
For woodworking projects, there are various options for topcoats. You can use tung oil, polyurethane, urethane, or any of the other clear finishes to protect your project. General Finishes Arm-R-Seal is a high-quality urethane oil-based topcoat. This makes it very durable and long-lasting. Arm-R-Seal is applied with a foam brush or wiped on with a cloth and it penetrates deep to give wood that deep natural look.
Most experts would not recommend putting polyurethane over shellac. This is because shellac is a robust sealer that doesn’t require any topcoat finish. However, in case you need to apply polyurethane over shellac, you should know that waxed shellac is not compatible with any under/over finishes. On the other hand, dewaxed shellac is compatible with all water-based finishes like urethane and polyurethane.
Difference between Shellac and Polyurethane
Before you understand why you can put Arm-R-Seal over shellac, you need to start by knowing the difference between shellac and polyurethane. Shellac is a wood finish that is manufactured from resins that are secreted by female lac bugs. It is a wood finish that dries quickly and is a good sealer or finish.
When applying shellac on a wooden surface, you can apply multiple coats in one day and complete the project in one day due to the fast-drying property.
On the other hand, polyurethane is a synthetic resin. Polyurethane is available in water and oil-based varieties, and it dries quickly and forms a tough film on wooden surfaces. The tough strength of this resin means it can be applied on different surfaces like floors, doors, furniture, windows, and cabinets.
Why you Can Put a Topcoat Over Shellac?
It is possible to add a topcoat over shellac. However, it will be extremely difficult to take it off. You’ll need acetone-free nail polish remover to avoid destroying both applications. You may also apply nail polish over shellac without damaging it, but you can never put shellac over nail polish as it won’t cure right.
Can you apply a coat of shellac over a topcoat? You definitely can. To make the shellac coat last longer, don’t rush the drying stage. Let it moisturize well keeping the polished surface away from direct sunlight.
Tools needed to apply ARM-R-Seal over Shellac
If you must put polyurethane over shellac, you’ll need the following tools
- Polyurethane like Arm-R-Seal
- Denatured alcohol
- Paper towel
- Brush
- Sandpaper
- Scotch Brite pad
How to Prepare New Wood for Finishing
Like any other woodworking project, the most crucial part happens way before you open any paint. When applying Arm-R-Seal over shellac, you need to start with sanding. Proper sanding smooths and cleans the wooden surface thereby opening the pores of the wood to accept the finish. Remember not to ruin a finishing job with a poor sanding job.
Here are the steps to follow:
- If you’re dealing with new wood, you need to start sanding with 130 grit and then followed by 150 grit sandpaper.
- For water-based stains, however, you need to sand a bit finer. On these stains, start with 120-grit and go up to 180-grit. The 180-grit removes the scratches that will be left by the medium grit sandpaper. Sand blocks can be used to sand grooves that are not easily accessible. Remember not to over sand because this will close the pores of the wood and not as much color will be accepted onto the wood.
- Never sand new stained surfaces but only apply Arm-R-Seal directly to the stained surface.
How to Prepare an Existing Finish
For surfaces with an existing finish, follow these steps:
- To clean an existing finish for paint or stain, you need 50/50 denatured alcohol, water, and scotch Brite pad. Cleaning an existing finish ensures that contaminants, dirt, and grime are removed from the surface. These contaminants will usually prevent good adhesion of the ARM-R-Seal and the shellac. The contaminants will usually result in chipping, flaking, and peeling.
- Pour a small amount of the solution onto the surface and scrub using the scotch Brite pad. Focus a lot on the heavily used areas.
- After leaving the surface to dry for 10 minutes, wipe it down with a towel to remove any dirt and grime buildup.
- Sand down the surface using 400-grit sandpaper.
How To Apply Arm-R-Seal over Shellac
Arm-R-Seal over shellac can be applied in two ways: by hand or by spraying.
- Hand Application
You can apply Arm-R-Seal over Shellac by hand using a foam brush, cotton cloth, or a staining pad. Using smooth and even strokes, apply a liberal amount of the product to the surface and wipe off any excess. You can use a good paper towel to wipe off the excess product.
- Spray Application
When spraying Arm-R-Seal, it is important to avoid uneven spraying. Apply thin coats (3-5 mm thickness) and wipe off any runs. The spray nozzle should be 6-8″ away from the surface and should be at a 90 degrees angle. For large and flat areas, you can spray even patterns with a width of 6-8″. Narrow surfaces should have a reduced spray pattern with a width of 2-3″ to minimize overspray. Remember a 10% overlap on each pass will conceal any spray lines.
To improve smoothness and adhesion, sand between coats with 320 grit sandpaper. Eliminate any dust with compressed air, a vacuum, a water-dampened rag, or a tack cloth.
To achieve the best results when applying Arm-R-Seal over shellac, you can follow the below-given tips:
- Here are tips to follow when applying Arm-R-Seal over Shellac.
- Always ensure you work in a well-ventilated area.
- Arm-R-Seal is an oil-based finish that deepens over time. Therefore, use raw wood or dark paint and never apply over white or light finishes.
- Always stir the finish thoroughly before use to mix any solids that will settle at the can’s bottom. You could also stir well and decant immediately before use.
- Always test for adhesion when you apply Arm-R-Seal over Shellac.
- Never apply more than 3 coats as this will not improve durability.
- You can prevent streaking by sanding well and recoating or by buffing using a 220-320 grit foam sanding pad.
Drying Time
The drying time is between 12-24 hours when applying Arm-R-Seal over newly stained or raw wood. Drying times for sealed surfaces can take up to 72 hours. The more layers of finish you add then the longer the drying time. Having a short drying period can trap moisture beneath the surface and lead to clouding. If you’re working in an area with high humidity, then you need to increase the air movement to ensure faster drying.
A simple way to determine if a finish is dry is if isn’t tacky and cool when you touch the surface. If nothing sticks when you press a cotton material, then the surface is dry. If you doubt that the surface is dry, then you can always allow the surface more time to dry.
Arm-R-Seal usually needs some time to cure and therefore it is advisable to avoid placing weighty objects on their surfaces before they cure. Treat the surfaces lightly and do not clean them with any other commercial products before the curing period.
Cleaning and Maintenance when Arm-R-Seal is Applied over Shellac
- You need to remove dust on your finished surfaces regularly. This is because dust build-up can scratch the finish and cause it to be dull. You can remove dust using a wet cloth
- Residues like smoke particles, cooking fumes, and fingerprints can also harm the finish and cause the surface to become dull and lose its luster. You can use water and mild soap to clean these residues from the finished surfaces.
- Arm-R-Seal behaves like all other furniture finishes. Therefore, avoids using dusting sprays, cleaners, and furniture polish that contain ammonia, alcohol, and silicone.
- As you use the finished surfaces, ensure you protect them from water, alcohol, and food spills by using coasters and placemats.
- It is important to note that excessive exposure to direct sunlight, high humidity, and high temperatures will damage finishes.
- If in the future, you want to touch up the project just know that the finish may not adhere well due to contaminants like silicone which seep through the finish and into the wood.
Final words
Although unnecessary, Arm-R-Seal can be applied over shellac. Proper preparation is important before Arm-R-Seal over shellac. Sanding smooths wooden surfaces and opens the pores of the wood to accept the finish. To improve drying, stir the finish to mix any settled solid particles and apply the finish in a well-ventilated area.
It is advised to keep Arm-R-Seal away from heat and flames and to avoid breathing in vapor or mist. You must wear respiratory and eye protection when spraying this finish on a wooden surface. Finally, always wash your hands thoroughly after handling Arm-R-Seal.
- Can You Unmix Paint: Techniques, Consequences, Alternatives - February 23, 2024
- Does Primer Need to be Mixed? Effective Primer Application - February 22, 2024
- How to Make Old Paint Usable Again: Retrieving and Preserving Paint - February 21, 2024


