When it comes to adding another dimension to art by creating different textures and effects on acrylic paints, acrylic mediums are unrivaled. Acrylic mediums coupled with different painting techniques can help produce beautiful pieces of art in different forms of paintings, such as miniature painting.
In this article, we’ll look at whether there’s any significant difference between two types of acrylic mediums–airbrush thinner vs. flow improver. Let’s start with an introduction to airbrush painting.
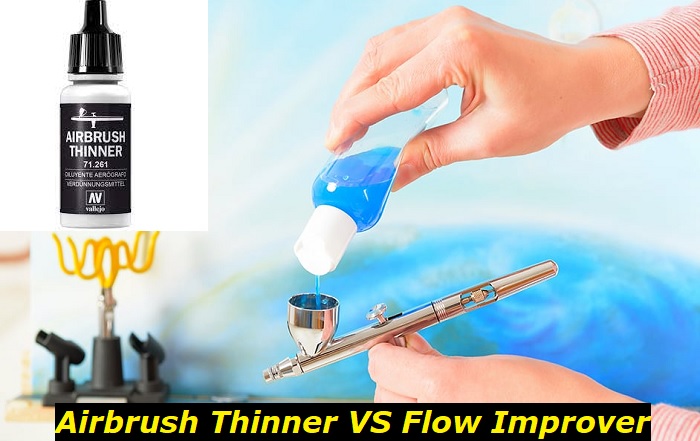
What is Airbrush Painting?
Airbrush painting is a painting technique that uses a unique device called an airbrush to create an even, consistent, and smooth blending effect on a surface. An airbrush consists of a little dispenser with a trigger. It resembles a small pen with a little tube attached to one of its ends.
The airbrush works by the concept of compressed air passing through a tapered hole at high speed. Pressure in the airbrush then drops, forcing the paint up and allowing air in. This leads to atomization. Atomization simply means the liquid paint particles breaking into tiny droplets.
Atomization creates seamless blends, coatings, and gradients hard to achieve using a standard brush. Airbrush painting is popular for miniature painting. Artists also use it to paint graphics on bikes, cars, phones, and even mural painting. Now that you have an idea of what airbrush painting is, let’s look at the differences between an airbrush thinner and a flow improver:
What’s the Main Difference Between an Airbrush Thinner and Flow Improver
Both airbrush and flow improver are mediums of liquid acrylic paints. The main difference between the two is that the primary purpose of an airbrush thinner is to reduce the viscosity of acrylic paint, while that of a flow improver is to break the surface tension of the paint.
Viscosity is a state of a liquid being thick, semi-fluid, and sticky. On the other hand, surface tension comes about from cohesive interactions of liquid molecules. It’s what makes water form a dome shape instead of dispersing on a flat surface. Let’s dive deeper into the two mediums:
Airbrush Thinner
Airbrush thinner thins paints such as watercolor, acrylic, and gouache for use in an airbrush. It does this by breaking down the binder to the paint. It maintains the paint’s integrity and minimizes build-up and clogging in an airbrush. You can also use it to create special effects such as gradations, layers, and highlights by mixing transparent colors.
The more you add a thinner to paint, the more you spread its pigment and weaken its coverage. That’s why you need to add the recommended ratio. Some manufacturers add surfactants to their thinners to reduce surface tension. This removes the need for adding flow aids while mixing the paint.
Benefits of Airbrush Thinner:
- It doesn’t affect the paint’s consistency, color, and adhesion.
- It increases the fluidity of acrylic paint.
- It’s suitable for fine-line detailed work.
- It helps create a superior fine spray pattern.
- You can use it to clean up the airbrush after use to prevent damage.
- It has an easy and smooth application.
- It’s easy to clean up.
Flow Improver
A flow improver lubricates the paint to increase its flow and produce long, nice, smooth strokes covering large areas. It chemically changes the acrylic paint’s consistency from sticky to silky without affecting the color of the finish composition. Professional flow improvers have acrylic polymer emulsions– binding agents also present in acrylic paint. You can mix it with paints, mediums, inks, or dyes.
The compounds in flow improver that decrease the paint’s surface tension are called surfactants. The concept is similar to adding a drop of dish soap to the water’s surface to break the surface tension. Breaking the surface tension helps because you can spray a more viscous paint at the same pressure you would use to spray paint without the flow improver.
The flow improver can also have additives such as retarders that slow the drying time of acrylic paint and minimize tip drying. This reduces the chances of the paint drying to a powder form before reaching its target surface. Flow improver is similar to airbrush thinner in that you can use it to thin the paint on wash techniques and cover large areas.
Benefits of flow improver:
- It doesn’t diminish the color vibrancy of paint.
- It enhances leveling of paint.
- It allows easy coverage of large areas.
- It makes the paint flow easily.
- It’s suitable for hard-edge painting techniques.
- It can last long since only a tiny amount is required.
How to thin Acrylic Paint
Airbrush paints are available in different brands. Some brands are ready to use, and you can add them directly into an airbrush, while some are thicker and require thinning before adding into an airbrush. Generally, opaque colors tend to be thicker than transparent colors hence the need for thinner.
If you don’t thin your airbrush paint, you’ll likely have to spray it with a higher PSI to get the desired spray pattern. This leads to the airbrush being overworked. Here are factors you should consider before thinning an airbrush paint:
- The airbrush’s nozzle size.
- The viscosity of the airbrush paint.
- The type of airbrush you’re using.
- The pressure you plan to use to spray the paint.
- What you want to do with the airbrush paint.
The above factors determine the ratio you can use to thin your airbrush paint. The most common ratios most people use are 1:1 or 1:4 of airbrush paint to thinner. You can thin paint in three different ways. The first is thinning by liquids such as water or alcohol, the second is by an airbrush medium such as flow aid, and the most recommended is by an airbrush thinner. Here’s why thinning by water is not recommended:
Reasons Why Water and Alcohol are Not the Best Methods to Thin Airbrush Paints
Using Water:
Water is the most available, cost-effective, and straightforward method of thinning airbrush paints. It brings a translucent look to the paint color and produces a soft edge. However, adding too much of it leads to flaking off, cracking, and weakening of the paint film.
Reasons not to use water:
- It doesn’t wholly bind with paint and creates an uneven consistency.
- It dilutes the binding agents and causes them not to stick on the painting canvas or hard surfaces such as wood.
- It dilutes the paint’s color reducing its vibrancy.
- It can lead to paint lifting off the surface once it drys.
- The paint could go moldy over time.
Reasons not to Use Alcohol as a Thinner:
You can use solvents such as alcohol and acetone to thin your airbrush paints. Commonly used alcohols are denatured alcohol or isopropyl alcohol (IPA).
The drawback to using such solvents is:
- They can be smelly and harsh.
- They also dry quickly and can be a disadvantage if you’re painting outdoors, where they may dry out before you’re done.
- They can change the color of the paint, causing it not to match evenly.
Why Airbrush Thinner and Flow Improvers are the Best Mediums for Thinning Airbrush Paints:
Both airbrush paint mediums are recommended for thinning acrylic paints. Here’s why:
- They maintain the paint’s body and consistency.
- They retain the richness and vibrancy of the paint color.
Basic Steps to Thin Acrylic Paint with Airbrush thinner:
The following are steps to using airbrush thinner to thin your paint:
- Make sure the acrylic paint you buy is made for airbrushing. To confirm look at its label or manufacturer’s instructions in the packaging.
- Put the paint in a container and add the airbrush thinner according to the manufacturer’s recommendation. You can also look at the recommended ratio in the manufacturer’s instructions.
- Shake the mixture vigorously for a minute, or use a mini whisk to mix. You can find the mini whisk at your local home depot.
- Remove the lid of the airbrush’s fluid cap and add paint halfway into the fluid cap, then close with a lid.
- Remove the needle cap and leave the needle of the airbrush exposed. This gives you better control and easy cleaning of the tip.
- Get a paper to test the fluidity of the paint.
- Hold an airbrush with both hands and press down to air while pulling back the trigger to paint.
- If you find the paint splattering because it’s too thick, adjust accordingly by reducing the paint or increasing the psi(pressure) of the airbrush. If you want to spray with low pressure, you’ll have to over-thin the paint.
- Your end goal is to have the paint spraying out nice and smoothly and can still produce fine detail.
Basic Steps on How to use Flow Improver
Follow these steps on using flow improver:
- Ensure the airbrush is clean and dry.
- Mix the paint with the flow improver in a plastic container according to the recommended ratio and shake thoroughly. A typical ratio of paint to flow improver is 1: 10 or 1: 20.
- Pour the mixture into the fluid cup of the airbrush.
- Test the paint on paper to confirm if it’s flowing smoothly.
Bottomline
There you have it. The difference between an Airbrush thinner and a Flow improver. Generally, their functions tend to overlap, making them almost similar. Ensure you use either of the acrylic mediums based on the brand of airbrush paint you’re using.
- Can You Unmix Paint: Techniques, Consequences, Alternatives - February 23, 2024
- Does Primer Need to be Mixed? Effective Primer Application - February 22, 2024
- How to Make Old Paint Usable Again: Retrieving and Preserving Paint - February 21, 2024


