Joint compound or drywall mud is a perfect solution for covering seams, nail holes, and other imperfections after installing drywall panels. You can use the joint compound for touch-ups and in a complete wall installation project.
A common question among joint compound users is the correct number of coats to apply before sanding. We will address this question in this guide and give you additional finishing tips to get outstanding results with any joint compound brand.
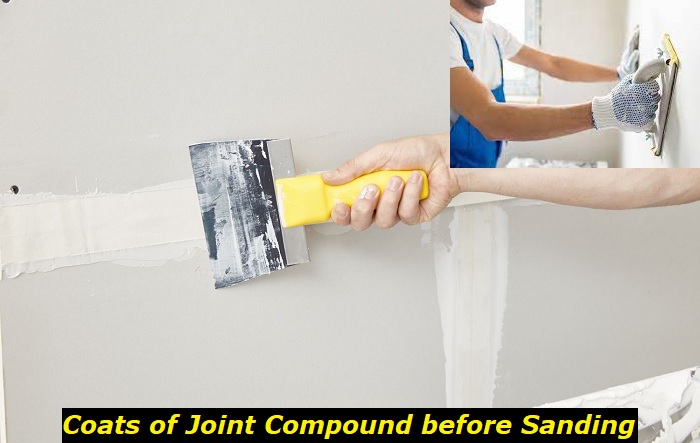
How Many Coats of Joint Compound Should You Apply?
Experts recommend at least three coats of drywall mud for a smooth finish. However, you may require a fourth or fifth coat, depending on the quality of the joint compound. An uneven surface may also require more than three layers to cover the dents and nail holes.
Skilled builders achieve an even finish with three coats. You may need more layers if you are doing your first DIY drywall project. However, you can achieve professional-looking results with the right application guidelines. Let’s go over the process step by step.
1. Applying the first coat
Start with coating the butt joints, that is, the points where the ends of the drywall sheets meet. You need a 4-inch knife to navigate the joints easily. The first coat fixes the tape in place. Hence, you need to apply a generous amount of the drywall mud on and under the tape.
Give the first coat at least 24 hours to dry. The first layer is rarely smooth. Do not sand after the first coat. Instead, use your knife to correct any obvious bumps and ridges. You just need the best surface possible to apply the second coat.
You may also notice a lift on the tapes’ edges when the coat dries. Cut off the lifted parts with a knife. Re-taping is necessary if the lift occurs in the center of the drywall. Cut out the lifted area and re-tape before moving on to the next step.
2. Apply the second coat
You need a bigger knife for the second coat. We recommend a 7-inch knife. Extend the second coat with about 4 to 6 inches on each side of the joint.
The second coat also needs at least 24 hours to dry before sanding. It is advisable to use 150 – 180 grit sandpaper. Ask your joint compound supplier for the appropriate sandpaper if you are unsure about the grit size.
3. Apply the third coat
The third coat should be the final and thinnest layer. Use a 12-inch knife for this one and increase the allowance on the sides of the joints to 7 to 12 inches. Extending the coat hides any imperfections.
Essential Drywall Finishing Tips for the Best Joint Compound Results
Our finishing tips will work for you if you choose the right type of joint compound. Here are the common types of drywall mud that you will find in the market.
All-purpose joint compound: The compound is premixed and versatile to use for all types of drywall projects. We recommend this drywall mud for DIY projects. It is light and easy to work with, from taping to finishing. However, professionals prefer thicker compounds for a smooth final layer.
Quick setting or timed joint compound: This type of mud is a great solution for small DIY projects or touch-ups. You do not need to wait for 24 hours or more for each coat to dry before applying another coat. Instead, the compound dries in five or fifteen minutes, allowing you to apply another coat immediately. The downside is that you can only mix the compound in small amounts.
Taping joint compound: The joint compound is designed for the first coat that holds the tape firmly. Hence, it dries hard and is tougher to work with compared to other types of drywall mud. Taping mud is challenging to sand. However, you do not need to sand it but instead remove any bumps with a knife.
Topping joint compound: The joint compound is easy to apply in thin layers. Hence, you can achieve a smooth final coat. It often comes in powder form. You will bear the inconvenience of mixing the powder with water, but the compound sets easily on the base coats. Another advantage is that you can save any leftover powder for future use.
Sanding joint compound: This type of drywall mud is used for drywall finishing. It differs from the topping compound in that it gives the best results when sanded. It is light, spreads smoothly, and dries fast.
Remember the following tips when finishing your drywalls:
1. Mix the joint compound thoroughly
If the drywall mud is mixed, stir up the compound thoroughly before application. Use a clean stick for each can to avoid contamination and lumps in the layer. Follow the manufacturer’s instructions carefully to mix the powder compound with water.
2. Keep the knife blade clean
It may seem like an additional task, but it helps to wipe the blade often as you apply joint compound. Any small lumps that form on the knife will show as scratches or bumps on the surface.
3. Do not use dry or frozen joint compound
Some joint compound types dry fast, especially the topping and sanding compounds. Do not overlook any dry bits of the mud when spreading. You will end up with unwanted marks or bumps on the wall.
Another tip is to ensure that the joint compound is at room temperature at least 24 hours before application. You will not achieve the best results with an extremely cold or frozen joint compound.
It is advisable to schedule wall installation in hot seasons or heat the room if the weather is extremely cold during the installation.
4. Do not rush the drying process
We have established that you need at least three coats of joint compound on drywalls. Each coat will take at least 24 hours to dry. The process may be longer in cold weather. Avoid rushing the process. Alternatively, use the timed compound for quick projects.
5. Do not over-sand
You can sand the drywall mud slightly after the second coat and after the third coat. However, you must be careful when sanding the last coat. You will need to apply an extra coat if you sand too much of the mud off.
6. Use the right knife at each stage
We have outlined the application process and pointed out the size of the knife to use at each stage. The size increases at each stage. You start with a 4-inch knife, then a 7-inch, and finish with a 12-inch knife.
The results will show if you use the same knife from the first to the last coat. Every shortcut becomes a lump or scratch on the surface. It is advisable to order the knives beforehand while ordering joint compound. You will reuse them for touch-ups and repairs in the future.
7. Try wet sanding
Dry sanding will help you achieve the even surface you need before applying a new coat. However, the method produces a lot of dust, which may be uncomfortable if you are sanding large surfaces. The dust may trigger allergies if you or a loved one is allergic to dust.
Wet sanding cuts down the dust and gives you the same results as dry sanding. A wet sponge is enough to sand the joint compound when the coat is completely dry.
What to Do When the Tape Is Visible
Can you see the underlying tape after following the application procedure? The problem is common, especially with butt joints. Just to be clear. The tape should show after the first coat and second coat. If the tape does not show, it means that you have applied the drywall mud in thick layers.
The final coat(s) should cover the tape completely. If not, add new thin coats in the same way as the underlying coats. Allow each coat to dry, and apply a new coat if the tape is still visible.
If the tape is showing on butt joints, apply more coats on the joint but spread it out on both sides for a flat finish. Remember that the final coats require a large blade knife. Use the 12-inch knife to smoothen out mud from the middle.
One of the reasons why the tape shows on butt joints is applying excess mud under the tape. Apply a little pressure on the knife when spreading the additional coats from the butt joints to remove the excess joint compound under the tape.
Conclusion
A smooth finish of the joint compound requires at least three coats. However, you can add a fourth and a fifth coat depending on the results of the first three coats. You do not need to sand the first coat. However, you need to sand the second coat slightly before applying the final coat.
Give each coat at least 24 hours to dry before sanding and applying the next coat. In addition, consider wet sanding instead of dry sanding to reduce dust. Avoid over-sanding because you will need new coats of mud to cover the mistakes. If the underlying tape shows through the mud or butt joints, add new thin layers until you cover the tape.
- Can You Unmix Paint: Techniques, Consequences, Alternatives - February 23, 2024
- Does Primer Need to be Mixed? Effective Primer Application - February 22, 2024
- How to Make Old Paint Usable Again: Retrieving and Preserving Paint - February 21, 2024
