Drywall is a construction material used for indoor walls and ceilings that are lightweight and water-resistant. It is available in different sizes, the most common of which are four-foot by eight-foot or eight-foot by sixteen-foot sheets. Although it is relatively inexpensive, you can face problems when fixing damaged Drywall.
The softness of Drywall makes it a popular material for painting and wallpapering. You can buy Drywall in different colors, usually painted white. To cover an area measuring four feet by eight feet, you will need around twenty-four sixty-inch by eighty-eight-inch sheets.
As long as you take proper precautions, Drywall is a safe material to use indoors. To protect your home in case of a termite infestation, some homeowners install Drywall over wood framing instead of the wood itself. Termites rarely eat through Drywall!
This article explores various ways to fix common ceiling drywall problems and tips on how to decorate your homes with it. We have solutions for you if you have a hole, dent, or crack in your Drywall!
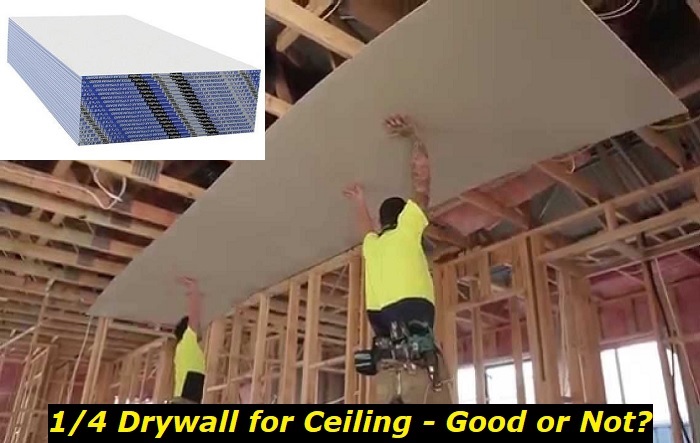
Is 1/4 Inch Drywall the best Drywall to use?
On curved surfaces, where ½ inch drywall may crack or not fit correctly, ¼ inch drywall is typically utilized. By doubling the layer to match where a half-inch drywall is laid, this drywall, which is soft, smooth, and flexible, may also be used to perform repairs. In addition, this drywall is utilized to layer or skim textured ceilings rather than remove them.
While it is often recommended to use ½ inch drywall for walls, there is a growing trend towards using ¼ inch drywall for ceilings. Proponents of this idea point out that the thinner drywall reduces weight and makes it easier to work with.
On the one hand, it certainly offers some advantages. For one thing, it is significantly thinner than traditional drywall, making it easier and less costly to install. Additionally, because it is lightweight and has good thermal insulation properties, using 1/4 inch drywall can also help you to reduce energy costs.
However, there are also some potential downsides to this approach. Since ¼ inch drywall does not offer as much support as standard-thickness drywall, there may be a risk of sagging or buckling over time.
In addition, its thin nature means that cracks or holes might be more visible from below if they develop in the upper layers of the board. Ultimately, then, whether or not this method is right for you will depend on a number of factors including your budget, preferences, and desired level of visual appeal.
How to Fix a Drywall Crack
A crack in the Drywall might look ugly, but it’s a minor problem you can easily fix. These are four ways to fix a drywall crack:
Method 1 – Reposition the Cracked Drywall Sheet
You can reposition the sheet if the cracked sheet is in a hidden area, such as behind a furniture piece. To do so, remove the painting from the cracked sheet section and put it back in place once you moved the sheet.
Method 2 – Fill the Crack with Plaster of Paris Mixture
Cracks tend to widen when water gets into them. Therefore, you must fix cracks as soon as possible to prevent further damage.
Place some paper tape over the crack and apply a coat of drywall compound. After that, apply some plaster of Paris mixture (also known as wet sand) on top of the drywall compound.
The plaster will set as you smooth it out. Upon drying, you may take away the paper tape and paint the section. You have just successfully fixed a drywall crack!
Method 3 – Replace the Entire Section of Cracked Drywall
If the crack is long or extends across the whole section of the Drywall, you will need to replace the entire section. To do so:
- Remove the painting from the section where the crack is located.
- Place new sheets of Drywall over the old ones, ensuring that the edges line up properly.
- Use a keyhole saw to cut through the middle of the old drywall section. Make sure you don’t cut into another wall!
- Remove the two sections of Drywall and replace them with new ones. Paint the repaired section once you’re done.
Method 4 – Repaint the Entire Ceiling
If the crack is in a prominent ceiling area above the door, you may want to repaint the entire ceiling. To do so:
- Remove the ceiling fan and lights from the section where you want to repaint.
- Paint the section first so the rest of the paint job will go more smoothly.
- After the initial application has dried, apply a second coat of paint and re-install the fan and lights. You have just successfully fixed a drywall crack in the ceiling!
How to Repair a Drywall Crack in the Ceiling
A crack in your ceiling can let in moisture and cause other problems, such as mold growth. However, fixing this minor problem early can prevent major problems later on. Here are three ways you can fix a drywall crack in your ceiling:
Method 1 – Insert Fiberglass Mesh into the Crack
One of the easiest ways to fix a drywall crack in the ceiling is to use fiberglass mesh. Here’s how to do it:
- Spray the crack with water to make it wider
- Insert the fiberglass mesh into the crack while the crack is open
- Let the resin dry and harden; the resin will bond the two pieces of Drywall together
- Paint the repaired section once it is dry
The resin that binds the two pieces of Drywall together hardens under pressure and turns into plastic. This prevents moisture from entering your home through cracks.
Method 2 – Apply Acrylic Cement over the Crack
If you don’t want to permanently fix the crack, you can use acrylic cement to fix it temporarily. This method will only work if the two sides of your ceiling drywall are already bonded together:
- Spread acrylic cement over both sides of the crack
- Allow the cement to dry and bond together the two sides
- Paint the rest of the ceiling; the repaired crack won’t show once the paint is applied.
Remember that this method doesn’t fix the two sides of the Drywall together. The acrylic cement only creates a chemical bond that’s strong enough to support the weight of the ceiling when it rains. So this method won’t prevent water from leaking through the crack when it rains.
Method 3 – Screw a Piece of Wood over the Crack
This method is similar to inserting fiberglass mesh into a crack:
- Spray the crack with water to make it wider
- Insert a piece of wood over the crack; the wood should be at least two inches longer on each side
- Let the resin dry and harden; it will bond the two sides of the Drywall together
- Paint the repaired section once it is dry
The wood will expand when the resin dries, creating a strong bond between the two pieces of Drywall. This method doesn’t protect the crack from water leaks, but it is a good temporary solution until you can spend money on a more permanent fix.
Method 4 – Purchase a Wrap Kit to Fix the Crack
Many hardware and home improvement stores carry wrap kits, including resin, sandpaper, and fibers. This is the most permanent solution to ceiling drywall cracks:
- Spray the crack with water to make it wider
- Insert fibers into the resin container; don’t let the fibers reach the top of the container
- Mix the resin and fibers until they become thick, like peanut butter
- Smooth the resin along both sides of the crack using a plastic film
- Let the resin dry and harden, which takes around 24 hours; the resin will bond the two sides of the Drywall together
- Paint the repaired section once it is dry
The kit will include instructions on how to properly wrap and install it. This repair kit seizes leak hotspots in plumbing pipes and roof cracks caused by weathering. It is a more expensive long-term fix for ceiling drywall cracks.
Method 5 – Replace the Entire Section of the Crack
This method is the best long-term fix for a ceiling drywall crack:
- Pull the loose section of Drywall off the nail head slightly
- Cut a piece of Drywall that is about two inches longer on each side than the damaged section
- Punch out the center nails on each side of the damaged section, allowing you to pull out the damaged section slowly and carefully.
- Fit the new piece into place and nail it in with center nails
- Paint the repaired section once it is dry
Replacing an entire section is the best way to ensure that water won’t leak through the crack. However, this is also the most expensive fix; you might want to consider this method only if your crack is close to a door or a high water flux area of the house, such as a bathroom.
How to Decorate with Drywall
You can also use Drywall to your advantage in other ways. Drywall is a versatile material that you can use for various purposes, including Ceilings! That’s right, with a little creativity, you can use Drywall to create beautiful and unique ceiling designs. Here are a few tips to get you started:
- Use different colors of Drywall to create interesting patterns.
- Texture the Drywall using various techniques, such as stippling or sponging.
- Incorporate lighting into your design by recessed cans or by adding sconces.
- Hang some artwork or other decorations from the ceiling to add visual interest.
With a little effort, you can transform your ordinary ceilings into something extraordinary!
Final Thoughts
Cracks in ceilings are not attractive and can also be a safety hazard; if the crack is caused by thermal expansion, the ceiling could collapse completely in a fire. However, you do not need to panic if the crack is due to mundane household activities such as resizing a closet or adding a window. One or more of the fixes outlined above should address the problem.
When doing any repair work on your home, it is always a good idea to protect clothing by wearing gloves and goggles. Additionally, never use a gas-powered appliance in an open space; carbon monoxide poisoning can kill you. Use these fixes and recommendations wisely, and your ceiling drywall cracks will never become bigger —and your house will remain safe and comfortable for years to come.
- Can You Unmix Paint: Techniques, Consequences, Alternatives - February 23, 2024
- Does Primer Need to be Mixed? Effective Primer Application - February 22, 2024
- How to Make Old Paint Usable Again: Retrieving and Preserving Paint - February 21, 2024


