Most homes will have a vertical drain line that connects the house to the sewer system. Tying into this line is not a difficult task, but there are a few common mistakes that people make when doing so.
In this article, we will dive into those mistakes and show you how to avoid them. We will also provide a step-by-step guide on how to properly tie into a vertical drain line. Of course, we will also show you the supplies you will need for the job.
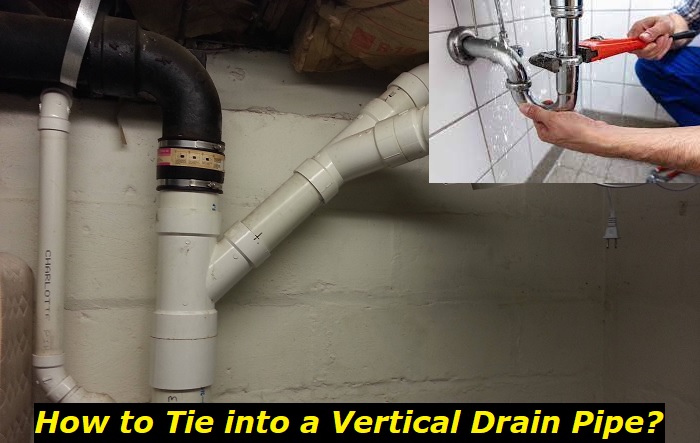
Getting started – The supplies you need
There are a few supplies that you will need to tie into a vertical drain line. Here is a quick checklist of those supplies:
- Trenching shovel – We suggest using a trenching shovel that is at least 12 inches wide. This will make it easier to dig a trench that is the correct size for your drain line.
- Pipe cutter– You will need a pipe cutter to cut the vertical drain line. Make sure to get a cutter that is the right size for your drain line.
- PVC pipe– You will need a PVC pipe that is at least 12 inches long. This pipe will connect the vertical drain line to your house.
- PVC glue– For attachment purposes, you will also need PVC glue.
- Teflon tape– You will need some Teflon tape to create a water-tight seal.
- A hacksaw– You will be cutting a small notch out of the PVC pipe, so a hacksaw will come in handy.
- PVC coupling– You will need a PVC coupling to connect the PVC pipe to the vertical drain line.
- A wrench– In order to tighten the PVC coupling, you will need a wrench.
- PVC primer and cement – You will need these in order to attach the PVC coupling to the PVC pipe.
Now that you have all of the supplies that you need, it is time to start tying into the vertical drain line.
Step-by-step guide
Here is a quick step-by-step guide on how to tie into a vertical drain line:
- Use the trenching shovel to dig a small trench from the house to the vertical drain line. The trench should be about 18 inches deep and 18 inches wide.
- Cut a section of PVC pipe using the pipe cutter. The length of the pipe will depend on how far away the vertical drain line is from the house.
- Use the hacksaw to cut a small notch at the end of the PVC pipe. This notch will help you fit the pipe onto the vertical drain line.
- Wrap some Teflon tape around the end of the PVC pipe. This will help create a seal when you attach the pipe to the vertical drain line.
- Attach the PVC pipe to the vertical drain line using a PVC coupling. Make sure that the coupling is tightened securely.
- Use a wrench to tighten the PVC elbow onto the other end of the PVC pipe.
- Use the PVC primer and cement to glue a section of PVC pipe to the inside of the house. This pipe will serve as your new drain line.
- Allow the cement to dry for 24 hours before using the new drain line.
6 Common mistakes
Now that we’ve gone over how to tie into a vertical drain line, let’s take a look at some of the most common mistakes people make when doing so. Of course, we will also teach you how to avoid these mistakes, even if you are a beginner.
Mistake number 1 – The trench is not deep enough
One of the most common mistakes people make when tying into a vertical drain line is not digging the trench deep enough. The trench should be at least 18 inches deep in order to allow enough room for the PVC pipe. If the trench is not deep enough, you run the risk of the pipe being damaged by lawn equipment or simply not having enough room to attach the pipe to the vertical drain line.
Mistake number 2 – Not using Teflon tape
Another common mistake is forgetting to use Teflon tape when attaching the PVC pipe to the vertical drain line. The tape is used for a reason – it will help avoid leaks and create a stronger seal. If you forget to use the tape, you may find yourself dealing with a leaking drain line.
Mistake number 3 – Not securing the PVC pipe
Another mistake that people make is not securing the PVC pipe to the house. The pipe should be glued in place using PVC primer and cement. If the pipe is not secured, it could become dislodged and cause problems with your drain line.
Mistake number 4 – Not allowing the cement to dry completely
It is important to give the cement 24 hours to dry in order to ensure that it is properly bonded. If you use the drain line too soon, you run the risk of the pipe eventually becoming detached from the house.
Mistake number 5 – Using the wrong size pipe
One final mistake that people make is using the wrong size pipe. The size of the pipe will depend on the distance from the house to the vertical drain line. If you use a pipe that is too small, it could become clogged or simply not work properly. On the other hand, if you use a pipe that is too large, it could cause problems with your drain line.
Mistake number 6 – Not checking for blockages and leaks
Before you use your new drain line, it is important to check for blockages and leaks. Run water through the pipe to ensure that it is not blocked. You should also check for leaks around the joints. If you find a leak, you will need to repair it before moving on with your project.
Vertical drain line maintenance – 6 tips to keep in mind
If you have successfully completed your project, you will also want to make sure that it stays in top shape for years to come. Here are a few tips to help you keep your drain line in good condition:
- Check for leaks regularly– It is important to check for leaks around the joints of your pipe. Use a flashlight to inspect the area and look for any wet spots. If you find a leak, you will need to repair it immediately.
- Check for blockages– From time to time, you should also check for blockages in your pipe. To do this, simply run water through the pipe and see if it is draining properly. If you notice that the water is not draining as quickly as it should, you may have a blockage.
- Clean the pipe regularly– It is also a good idea to clean your pipe on a regular basis. This will help to prevent any build-up of debris that could eventually cause a blockage.
- Repair any damage immediately– If you notice any damage to your pipe, it is important to repair it as soon as possible. Otherwise, the damage could worsen and eventually cause the eventual repair job to be more time-consuming than it has to be.
- Check for damaged parts regularly– Over time, the various parts of your pipe may become damaged. In particular, you should check the joints and connections for any damage. If you find any damage, you will need to replace the damaged part.
- Replace the pipe once it is completely worn out– Even with the utmost care, the pipe will eventually need to be replaced. The best sign of a pipe beyond repair is extensive corrosion. If you notice large quantities of corrosion, it is time to replace the pipe.
Conclusion
Tying into a vertical drain line is not as difficult as it may seem. However, there are a few common mistakes that people make when doing so. By following the instructions in this article, you can avoid these mistakes and tie into a vertical drain line like a pro!
- Can You Unmix Paint: Techniques, Consequences, Alternatives - February 23, 2024
- Does Primer Need to be Mixed? Effective Primer Application - February 22, 2024
- How to Make Old Paint Usable Again: Retrieving and Preserving Paint - February 21, 2024


