No furious scrubbing for you! WD40 will make removing silicone sealant from your tiles a quick and easy task. If you are reading this, chances are your tile repair or installation project has ended up with silicone stuck where it shouldn’t be. You are at the right place.
We will help remove the silicone sealant from where it shouldn’t be. When you are done reading this, you will know everything there is to about getting rid of the so that your perfect work can gleam untarnished.
This article will explore these topics:
- What is WD40
- Alternative to WD40 for removing silicone from your tiles
- Step-by-step instructions for using WD40 to remove the silicone sealant
- Tips for reapplying silicone sealant without making a mess.
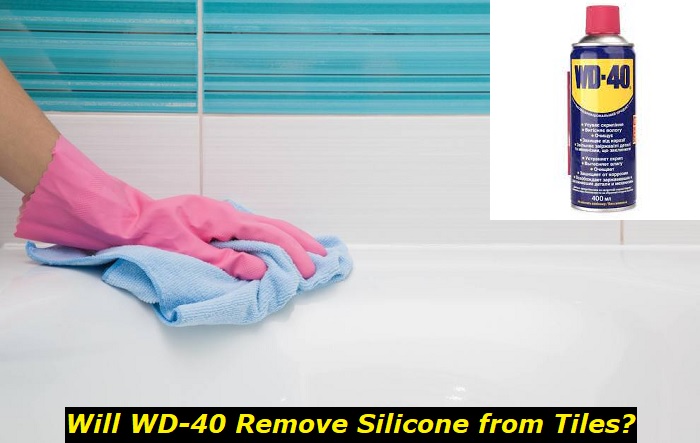
What is WD40
People use WD40 to clean just about anything that needs a gleam. It should not come as a surprise, that this versatile product can also remove the silicone sealant from your tiles effortlessly. Originally formulated for NASA in the 1950s, the military began using it and eventually, the wonder product spread into garages and households everywhere.
Though the water displacement 40th formula was originally designed to remove moisture and clean rust, people now use it as a lubricant, penetrant, and rust preventive. Let us get into how this jack-of-all-trades will come in handy when removing the silicone sealant from places it shouldn’t be.
Alternative to WD40 for Removing Silicone Sealant from Your Tiles
If you had rather not use a highly toxic industrial solvent in your home despite the time and energy-saving advantages, there are options for you too. In case you don’t mind having elbow grease as a major tool, you can go old school and scrape off the sealant with a razor.
Environmentally conscious homeowners can use vinegar and a significant amount of elbow grease to remove the silicone sealant. If you aren’t opposed to chemicals but consider the WD40 guns to be too big for the measly silicone sealant on your tiles other formulations are less toxic and just as effective as WD40. The most effective is industrial-grade isopropyl alcohol.
How to Remove Silicone Sealant from Tiles Using WD40
Removing the silicone sealant using WD40 is very easy. Most of your effort will go into ensuring that you use the WD40 safely without harming yourself, the tiles, or the environment in the process.
1) Gather Your Tools
Like any DIY project, it is ideal to ensure you have everything you need before getting started. Isn’t disastrous to wander around the house looking for something, or have to drive to the hardware store and leave your project midway?
When purchasing WD40, buy the following items as well, if you do not have them at home.
- Scraper
- Gloves
- Goggles
- Face mask
If all the protective equipment seems like overkill, it shouldn’t once you remind yourself that it was formulated for use in professional settings, not domestic ones. Gloves and a mask are essential, especially if you are working in a confined and poorly ventilated area like a bathroom.
2) Read the Safety Instructions
It is wise to familiarize yourself with the manufacturer’s instructions on how to use WD40 safely in a domestic setting. The product contains benzene which makes it quite irritating to the skin, lungs, and eyes. Stop using the product if you feel dizzy or drowsy while using it.
WD40 should not be used near exposed flame because it is highly flammable. The product is also not recommended for use outdoors because of its chronic aquatic toxicity. The pressurized container should also be disposed of responsibly. The canister should not be pierced or exposed to high temperatures because it may burst if exposed to high temperatures.
3) Prep the Areas With Excess Silicone Sealant for Removal
Don’t go spraying your WD40 onto the tiles before prepping the entire area. This step is very simple. All you need to do is remove all obstructions or delicate items from the area you will be working on. This ensures that you will not accidentally bump into or break some items once you get started.
4) Apply the WD40 onto the Excess Silicone Sealant
Before spraying the WD40 onto your tiles, ensure the entire area is completely dry. If the tiles are wet, pat them dry using a clean cloth and allow them time to air dry. If you are in a rush, use a blow dryer to ensure there isn’t a drop of moisture on the tiles or silicone sealant.
You are now ready to get your gloves dirty. Begin by peeling away loose silicone that isn’t too stubborn to your scraping attempts. Once the loose silicone is removed, spray the WD40 directly onto the excess silicone sealant. The multi-use WD40 spray has a smart straw function that you can rely on to ensure the solvent is applied precisely and does not stray to tile areas that are not affected by the silicone sealant.
5) Allow the WD40 to Sit
After covering the excess silicone sealant with WD40 allow it to sit for a few minutes. This is where WD40 really shines because most solvents need to sit for hours to soften the silicone sealant. Softening the silicone sealant is essential because it reduces the amount of energy you will need to scrape off the sealant. The less effort you need, the less likely you are to damage the surrounding tiles.
It is recommended not to hang around in the room while the WD40 soften the silicone sealant. If you want to reward yourself with a snack, remove all your protective gear, and wash your hands thoroughly before touching anything, including your skin. Are you wondering how to figure out if the WD40 has sat for long rough? Simply feel the silicone sealant for softness. Once the sealant softens and is loose enough, it is time to scrape it off.
People who opt to remove the sealant without WD40 can try heating the surface of the silicone sealant to speed up its softening and reduce the amount of elbow grease involved. Applying a blow dryer or heat gun to the affected areas for at least thirty seconds and no more than two minutes should have a noticeable effect.
6) Scrap off the Silicone Sealant
Using WD40 ensures that scraping softened silicone sealant from your tiles is as easy as peeling a banana. A utility knife, pocket knife, or sharp blade should do the job just right. The silicone should come off easily.
Do not use excessive force to scrape off the silicone tiles because it is likely to damage the surrounding tiles. Start scraping from one end of the silicone caulking and work your way through the entire strip. Try your best to cut the silicone near the underlying layer.
7) Clean the Residue
Once you scrape the silicone off the tiles, you will end up with residue that contains adhesive used to secure the silicone, some dirt, and perhaps even worn-down paint. Use your scraping tool to remove all the residue to leave an even surface. The leftover residue will create an uneven residue that will make reapplying the silicone very challenging. You certainly don’t want that.
After scraping away all the residue to leave behind an even surface, sweep it into a dustpan. Wrap the residue securely and dispose of it. Next use soapy water and a cleaning cloth to ensure there aren’t any residues Clean up the residue removed using clean water and a cleaning cloth.
8) Repeat the Process if Necessary
If some of the silicone sealant continues to cling to your tiles, reapply the WD40 and allow it to sit until it softens. Once your tiles are finally free of the silicone sealant, Ensure you clean all traces of the WD40 from your tiles, especially if you are applying another coat of silicone sealant to prevent the two products from reacting.
9) Clean Up
After using WD40, it is important to scrub up thoroughly. Do not leave a trace of the stuff on your tiles, body, or clothing.
10) Reapply New Silicone
After stripping the tiles of the silicone sealant, you should not leave the surface bare for too long. A bare surface is likely to suffer water damage that could foster conditions for the growth of the dreaded black mold.
When applying the sealant, ensure you use a steady hand and apply as little as possible. Using too much sealant is a common mistake that often creates a mess. If you put on a little too much, wipe it off immediately using a damp towel or sponge. Do not allow the silicone sealant to dry and harden because removing it is not a fun task.
Conclusion
Using WD40 to remove silicone sealant from your tiles is as easy as ABC. The trick is to stay safe while doing so. The toxicity of WD40 cannot be overstated. When not using the substance, be sure to store the can in a hard-to-reach or locked cabinet. As promised, you are now ready to use WD40 or an alternative method described herein to remove the silicone sealant from your tiles like a pro.
- Can You Unmix Paint: Techniques, Consequences, Alternatives - February 23, 2024
- Does Primer Need to be Mixed? Effective Primer Application - February 22, 2024
- How to Make Old Paint Usable Again: Retrieving and Preserving Paint - February 21, 2024


