Have you ever thought of difficulties you may encounter if you choose to paint over the factory paint? This article discusses the difficulties of painting over factory paint.
It discusses what it means to paint over factory paint, difficulties you may encounter with the job, and fixing the problems.
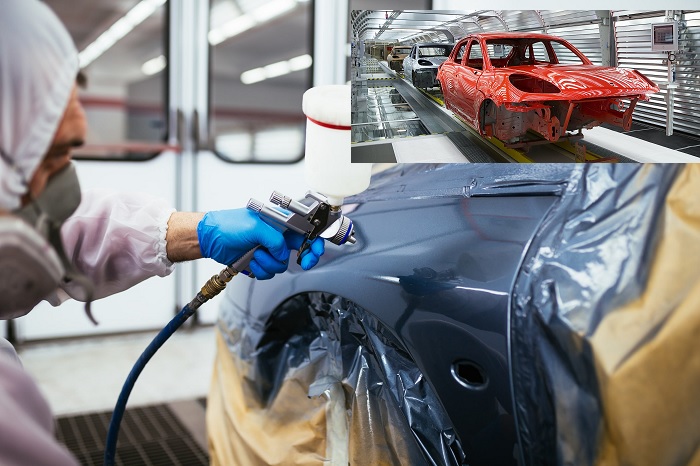
Painting Over Factory Paint
Painting over an existing surface paint means that you can apply new paint over an already existing paint job on your car. This is possible, especially with the market’s modern paints today. But it would be best to make sure that the factory paint you want to paint is in good condition and lightly sanded.
If the factory paint is damaged, you would have to remove the old paint if you are convinced that it will cause problems in the future. However, there are some difficulties you may encounter when painting over factory paint. Below are some common challenges and how to fix them.
Difficulties of Painting Over Factory Paint
Flakes and Peels
The first difficulty you may experience is pieces of dry paint flaking off from your car after a paint job. What happens here is that the paint film is no longer sticking to the substrate. So it breaks and flakes away.
A common reason for this difficulty is the improper abrasion of the substrate. When you fail to properly prepare the surface on which the paint is to be applied, any unaddressed rust or other interfering materials beneath the paint will fracture the paint layers. This delamination may occur right after the paint job or subsequently.
Another common cause for this challenge is a thin film. A thin film will break in layers because it is not sufficiently thick. Also, if there is no uniformity in applying the paint, there is a high tendency that the paint will eventually break and begin to peel off.
Finally, failing to observe the correct curing time may also lead to peels and flakes. When you fail to follow the recommended curing time for certain undercoats before sanding and adding a topcoat, peels and fragments will be inevitable.
Bad Hide
A second difficulty you may encounter when painting over factory paint is flawed covers. The objective of painting is usually to hide blemishes on the vehicle’s body or prior paint. However, you may find that the topcoat still reveals the underlying imperfections you tried to hide.
A common reason for this challenge is using uneven color on the substrate or improperly preparing your paint. This is the case, especially when you fail to stir your paint properly after leaving it for an extended period. Paints usually settle after being left idle for a long time.
Also, using the wrong primer colors or applying too much reducer can make it difficult for your paint to hide the blemishes or earlier paints satisfactorily. Since reducers are often transparent, using too much reducer usually impedes the normal hiding level of your paint. And some primer colors are pretty difficult to cover if the paint color is lighter.
The improper handling of the spray can also cause this problem. Spraying too far from the substrate will leave a thin paint film. The thin paint film will not hide the color beneath properly.
Dealing with the orange peel problem
The third common problem you may encounter when painting on factory paint is orange peel. Essentially, your finished work looks roughly like the body of an orange peel. It is not smooth.
The reasons for this result are many. The first is applying coats that are too thick. When you use thick coats, you risk preventing the paint from flowing to an even film before drying.
Another reason for this challenge is using the wrong reducers. Wrong reducers will make your solvent evaporate too quickly, and this will make your paint film dry faster way before the material has adequately flowed out to the glossy appearance.
Finally, using the wrong spray gun, spraying with low pressure, or positioning the tip well can cause orange peel. It will essentially prevent the paint from atomizing well, which will lead to orange peel.
Dealing with fisheyes
The fourth difficulty with painting over factory paint is fisheyes. Fisheyes are tiny air bubbles that form on the paint film during or after the paint job. The main reason for fish eyes is the contamination of the substrate.
Contaminations may include oil, grease, wax, or silicone on the substrate you spray your primer on. They usually appear as small circular pops scattered throughout the paint film.
Also, reusing shop rags that have been used in silicone or other materials can contaminate the substrate and lead to fish eyes.
How to Deal With These Painting Challenges
- Fixing Flaking and Peels
If the flaking and peeling are insignificant, remove the affected part and paint the problem areas as a repair spot.
But if the problem covers a large paint area, it would be best to sand the paint surface, reapply the paint and build a good film. Also, ensure that your work surface is not cracked and the hardener you use is not too strong.
- Fixing a Bad Hide
All you have to do is properly stir the paint and apply it uniformly until the needed concealment level is achieved.
- Fixing Orange Peel
Start wet sanding with an 800-grit abrasive disc. Continue wet sanding with a 1500 grit and a 2500 grit in that order. It would help to use a foam interface to fit the face of the bodywork and a 600W orbital buffer. The foam will ensure that you do not destroy the paint job. Other orbital buffers may also give excellent results.
The orbital buffer allows the disc to rotate constantly. This reduces the risk of piercing the clear coat. Ensure to wet the discs and the surface before wet sanding and keep to a medium rotating speed. Excessive speed can pierce the clear coat.
Also, ensure to rinse with water after each sanding. After sanding, remove the foam interface and attach a hard buffer. Proceed to polish the surface, then wax it. Apply the polish to the pad and polish the clear coat.
Wipe off the leftovers of the wax product with a cloth. Limit the swirl marks with an all-purpose waffle foam polishing pad. Attach it to the orbital buffer and put some finishing polish on it. Proceed to polish the clear coat. Wipe off the leftovers again with a microfiber cloth.
If you can still see the traces of the wet sanding, you can achieve a brilliant glossy coat with a paint renovator product. You can use a microfiber cloth to apply it on the clear coat or an orbital buffer with a medium-hard pad.
A one-minute shine should get you a brilliant glossy finish. Do not exceed one minute, and ensure to wipe the leftovers of the product before it dries. If you like, you may apply a protective wax over the brilliant finish to protect it.
- Fixing FishEyes
To fix it while the paint is still wet, it would be best to remove the paint with a solvent. After that, you can prepare the surface and reapply the paint.
But if the paint is dry, you would have to sand out the fisheyes with 1200-grit paper and reapply the paint. Ensure the surface is clean before reapplying the paint.
It would also help to spray at an appropriate distance. 9 to 12 inches away from the surface will give you more control over the spread and aid any correction. Also, it would help to work in a ventilated environment.
Final thoughts
Only painters who have done their homework right can do great paint jobs. With the solutions given in this article, you are guaranteed to keep a track record of excellent paint jobs.
- Can You Unmix Paint: Techniques, Consequences, Alternatives - February 23, 2024
- Does Primer Need to be Mixed? Effective Primer Application - February 22, 2024
- How to Make Old Paint Usable Again: Retrieving and Preserving Paint - February 21, 2024