Medium Density Fibreboard (MDF) is a commonly used material in furniture and decoration due to its smooth and uniform surface. However, its usage often leads to specific issues such as damage to the screw holes. Damage to the MDF screw holes can weaken the structural integrity and mar the aesthetics of the furniture.
Addressing these issues involves identifying the damaged MDF screw hole, gathering the necessary repair tools and materials, executing the step-by-step repair process, and post-repair finishing and painting. This informative guide will provide expert advice on how to effectively repair MDF screw holes, ensuring both the stability and aesthetic appeal of your MDF pieces are preserved.
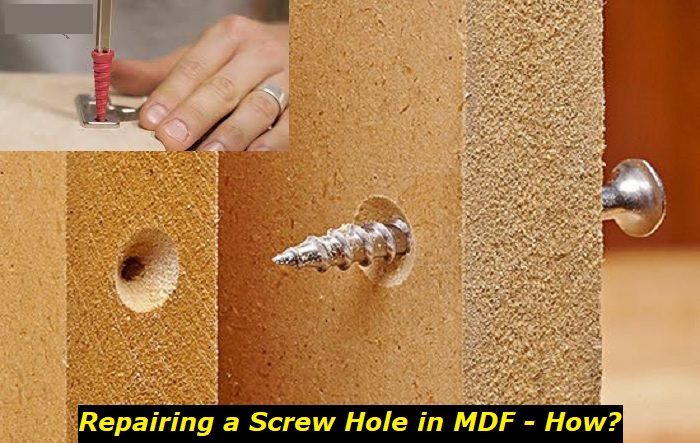
Recognizing A Damaged MDF Screw Hole
Navigating the world of Medium Density Fiberboard (MDF) peculiarities, one needs to understand exactly what a damaged MDF screw hole looks like and the effect it can have on your furniture or decorative piece. A damaged screw hole in MDF typically presents itself as an expanded, degraded, or strip-threaded hole. It becomes unable to hold the screw firmly, causing it to loosen over time.
This is quite a common issue, especially as MDF tends to break down and chip quite easily due to its compressed fibre structure. It’s crucial to identify this issue promptly as it may not just affect the aesthetic aspect of the furniture, but it may also compromise structural integrity. You don’t want your beautifully crafted bookshelf or bed frame to wobble or, worse still, collapse because the screws holding it together are not anchored properly.
Quite often, you’ll notice the screw spinning with no signs of tightening – a sure-fire sign the hole has been damaged. You might also see a visible crumbling or breakage around the screw hole. Stronger signs include the screw not staying in place at all, falling out immediately after you release it.
Being quick on your feet in identifying damaged MDF screw holes is the first major step towards salvaging the strength and beauty of your pieces.
Necessary Tools and Materials for Repairing MDF Screw Holes
The proper repair of damaged MDF screw holes requires certain tools and materials that will not only allow for an effective repair but will also leave your MDF piece looking as good as new. The basic items that you need include wood filler, a putty knife, sandpaper, and screws that are the appropriate size for the hole.
You will need the wood filler to fill in the hole and create a surface area that the screws can grip onto. A high-quality wood filler is essential in this aspect as it ensures a strong and durable repair. The putty knife, on the other hand, is required to accurately and smoothly apply the wood filler into the screw hole.
Sandpaper, specifically medium to fine grit sandpaper, is another paramount tool in your MDF repair task. After filling the screw hole with the wood filler, wait for it to dry and use the sandpaper to smooth out the surface. Sanding is a crucial step in ensuring that any excess filler is removed, and the surface is level and ready for finishing.
Finally, you will need new screws, ensuring they are the correct size for your MDF piece and for the screw hole. This will ensure that once the hole has been filled and sanded, the screws will fit back into the hole, maintaining the structural integrity of your MDF.
Choosing the right tools is halfway to a successful MDF repair.
Step-by-Step Guide: How to Repair Damaged MDF Screw Holes
When it comes to repairing Medium Density Fibreboard (MDF), the process doesn’t have to be intimidating or overwhelming. With a little patience, the right materials, and a sprinkle of can-do attitude, you can effectively repair those damaged MDF screw holes and reclaim the original integrity and beauty of your MDF pieces.
Before you start, ensure you have a clear workspace and have donned necessary safety gear, such as gloves and safety glasses. Also make certain the damaged MDF piece is on a stable, flat surface that you don’t mind getting a little messy.
Firstly, let’s direct our attention to removing any loose or splintered material from the damaged screw hole. This can be achieved by utilising a small chisel and gentle force. Be careful not to apply pressure excessively, as we’re aiming to maintain as much of the original MDF material as possible. Remember, the main goal here is to smooth the area, prepping it for the filler.
Now, we arrive at a critical step: filling the hole. The perfect accomplice for this task is a good quality wood filler. Choose a filler that complements your MDF by referring to the product details. Once you have the right filler, apply it dexterously but generously into the screw hole. For larger holes, you might need to apply the filler in layers. Allow each layer to dry before applying the next one. Continue building it up until it’s slightly higher than the board’s surface.
Patience will be your best friend during this process. Providing enough drying time between layers will help build a sturdy repair. Once you have finished filling, and the filler is completely dry, it’s time for sanding. This step aids in leveling the filled area with the rest of the surface. A small piece of sandpaper should provide the precision needed to smooth down the area perfectly.
After all the dust has settled, your MDF should be looking almost as good as new. If desired, you can prime the repaired area to prepare it for painting. The best primer to use is one designed specifically for MDF surfaces.
The final stage involves painting the MDF surface. A few coats of quality latex paint will usually provide an excellent finish. Once the paint is dry, your repaired MDF screw hole is ready for use again.
Following these diligent steps should restore your MDF’s aesthetics and durability while providing a soothing touch to the joy of DIY.
Post-Repair: Finishing and Painting Your MDF
Once you’ve successfully repaired the screw holes in your MDF, the next vital step is to finish and paint the surface. This process requires meticulous attention to detail, but it can beautifully restore your MDF furniture or decorations to look like new. Remember, MDF is a porous material, so it’s crucial to seal the surface before painting.
Begin by smoothing the repaired area and any rough edges with a high-grit sandpaper. While sanding, work in the direction of the wood grain where possible to prevent accidental scratches or marks. Once properly sanded, dust off the residue and wipe the surface with a damp cloth.
No matter how inclined you might be to rush into painting, don’t skip priming! Applying a primer is imperative for a stunning, long-lasting paint job. An oil-based primer is a suitable choice for MDF, as it seals the porous surface effectively, preparing it for painting. Let the primer dry completely before proceeding.
Next, choose a paint that is appropriate for MDF. Acrylic latex paint is a popular choice due to its durability and ease of use. Use a roller or brush to apply the paint in thin layers, allowing each layer to dry completely before applying the next one. The key to achieving a smooth, solid color is multiple thin layers, rather than one thick layer of paint.
Lastly, consider sealing the paint with a clear, protective coat for added durability, particularly for furniture items subject to heavy use. You’ll be amazed at how fresh and polished your MDF piece can look with careful painting and finishing.
- Can You Unmix Paint: Techniques, Consequences, Alternatives - February 23, 2024
- Does Primer Need to be Mixed? Effective Primer Application - February 22, 2024
- How to Make Old Paint Usable Again: Retrieving and Preserving Paint - February 21, 2024


