As a truck owner who is dedicated to maintenance, you will eventually need to repaint your truck at some point in its life. Whether you are a seasoned expert or a novice, the art of painting a truck can be challenging but exciting at the same time. To make your job easier and ensure you achieve an aesthetically pleasing result, you need to meticulously prepare the truck before proceeding to paint.
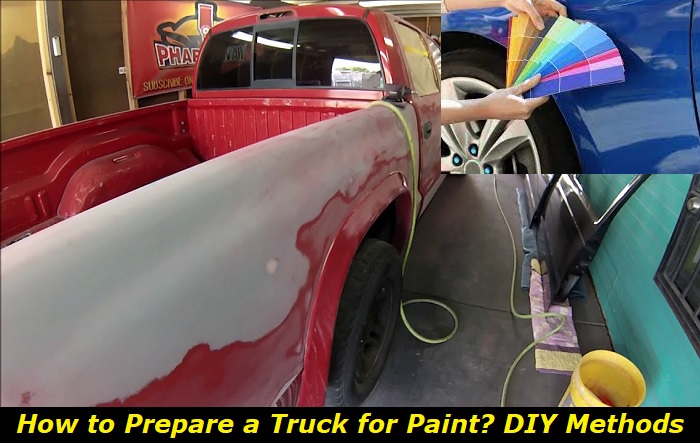
Here is how to prepare a truck for paint:
- Clean the truck
- Check the truck for imperfections and fix them
- Sand old paint
- Get rid of loose particles
- Use a primer and sealer
- Mask areas that will not be painted
Trucks are pretty big vehicles and repainting them is no easy feat, neither is the preparation procedure. Therefore, a truck painting project might take a while to complete. It will also consume more materials than is required to paint a smaller car.
Nonetheless, keep reading this article to get a deep insight into how to prepare your truck in order to achieve a perfect finish. We promise to provide you with tips that will make your project worth your while and resources.
Cleaning the truck
The first step required to prepare your truck for paint is a thorough cleaning to remove dirt, dust, and grime. Cleaning the truck will allow proper adhesion of paint and enable you to achieve a smooth finish.
Not only that but having a clean surface will enable you to see the imperfections that need fixing before proceeding to apply paint. Wash the truck with water, mild soap, and a non-abrasive sponge or microfiber cloth.
It is important to pay close attention to areas like the wheel wells, undercarriage, and grille, as they tend to accumulate the most dirt. When the truck is clean, give it some time to air dry.
Checking and fixing imperfections
The next step in preparing your truck for paint is to check for imperfections and fix them. Do this by assessing the entire body of the truck. With the truck spotless, noting areas with imperfections like dents, scratches, and rust should be easy.
Here is how to fix the imperfections accordingly:
- Rust
To get rid of rust, use fine-grit sandpaper to sand the rusted areas until a clean layer of metal is reached. Then, apply a rust inhibitor to the area to avoid further corrosion.
An alternative method of removing rust and preventing further corrosion without sanding is the use of a rust removal solution. Start by applying the rust remover to the area. Then, according to the instructions on the product, give it time to react with the rust.
When the chemical reaction is complete, you will be left with particles that can be wiped off with a piece of cloth leaving behind a rust-free surface.
- Scratches
To smoothen out scratches on the truck, use fine-grit sandpaper to sand the areas until smooth.
- Dents
Repairing dents on a truck can seem like a daunting task to perform yourself, but it is achievable with the right skill and supplies. Sometimes, dents occur in parts of the truck where you cannot reach underneath to push them out. Hence, dent repairs are mostly carried out on the surface.
Dent happens when some parts of your truck pull inward when impacted by external forces. Therefore, repairing them simply requires creating the right amount of force to suction out the areas. To fix your truck’s dents at home without visiting an auto body shop, you can:
- Use an auto-body filler
- Use a dent removal kit
- Use household materials
1) Using an auto-body filler
With the right auto body filler, you can easily level out dents on your truck. Here’s how to go about it:
- Use a marker to highlight dented areas on your truck.
- Sand the truck surface to expose the metal. This step is important because auto fillers will not adhere to painted surfaces. Do this by using coarse grit sandpaper.
- Clean loose particles from sanding.
- Mix the filler and hardener according to the manufacturer’s instructions.
- Use a plastic spreader to apply the filler mixture to the dents and smoothen it out with the surrounding areas.
- Leave the filler to dry.
- Use fine-grit sandpaper to sand the filler with the rest of the truck’s body.
2) Using a specialized dent removal kit
Another way to get rid of the dent is by using specialized dent remover kits. These kits cost less than hiring a professional auto body technician and can come in handy for future use. The dent removal kits are readily available at auto parts stores and are easy to use by following the instructions on the product.
3) Using household materials
If you’re trying to save cost or you just enjoy creating DIY projects using makeshift tools, then you might choose to fix your truck’s dents using materials you already have lying around your house. Here are the methods of removing dents using household materials:
- Using a plunger
A plunger is not only effective for clearing drains and pipes, but it also has other unconventional uses like getting rid of shallow dents on malleable surfaces. To use it for this purpose, wet the dented areas on the truck and the plunger cup. Then, use the plunger to suction out the dents in a series of push and pull motions.
- Using the heating and cooling method
This method of getting rid of dents involves leveraging the effect of heat and cold on metal sheets. It involves using a heat-producing tool like a heat gun, lighter, or air dryer and a cold-producing material like compressed air or dry ice. Start by heating the dented areas with the heat-producing tool.
After heating for a while, remove the heating tool and apply the cold-producing material to the spot. The rapid transition from heating to cooling will often cause the metal to contract and pull out the dents.
- Using wooden knobs, screws, and hot glue
For this method, you need to cut out several 4-inches sections from a wooden rod to form short knobs. Then, create a handle for gripping each wooden knob. Do this by pushing nails or screws on two opposite sides of each knob or running a bolt all the way through.
Make sure the handle is firm enough to grip and pull. Then, apply hot glue at the bottom of each wooden knob and glue them to several locations on the dented area. Allow the glue to dry and start pulling them out by grabbing the handles.
Pull the knobs out repeatedly until the dents are completely removed. When you are satisfied with the result, gently scrape off the glue and use rubbing alcohol to clean off the residues.
- Using a vacuum cleaner and container
The best household appliance that comes to mind when it comes to suctioning is a vacuum cleaner. Hence, we can also use it to create a suction effect to remove dents from our truck surface. To achieve this, you need to make a hole just the size of the vacuum cleaner hose at the bottom of a container.
Then, affix the container over a dent using tape or hot glue. When the container is firmly fixed, insert the vacuum cleaner hose through the hole at the bottom of the container. Finally, operate the vacuum cleaner and let it suction out each dent.
Sanding off paint
Having repaired all scratches, rust, and dents on the truck’s surface, the next step in preparing our truck for paint is getting rid of old paint. You can skip this step if the paint is not cracked or peeled, or simply sand areas with damaged paint. However, we recommend sanding the entire truck surface to bare metal.
Doing this will foster proper adhesion of paint and create a smooth finish. To do this, use an electric orbital sander or sand manually. Using an electric sander will save time and effort, especially because the truck surface is a large area to work on.
However, for corners and crevices where the electric sander cannot readily reach, it is recommended to sand by hand. Whether you are using an electric sander or hand sanding, here is how to sand your truck in preparation for fresh paint:
- Start sanding with 180-grit sandpaper in a circular motion.
- Next, use 300-grit sandpaper to sand the surface again
- Finally, wet sand the entire surface using 1200-grit sandpaper to create a polished finish.
Cleaning off dust particles
Sanding creates lots of dust and loose particles. Hence, it is crucial to clean the entire truck surface with a damp cloth and leave it to dry before proceeding to the next step.
Using primer and sealer
The next thing to do in preparing your truck for paint is to apply primer and sealer all over the truck’s surface. The primer will create a protective barrier for the surface and enable the paint to adhere properly. Choose the right primer that’s suitable for use on metal.
Apply one to two coats of primer and allow each layer to dry before proceeding. Finally, apply a sealer and let it dry. The sealer locks the primer in and acts as the last canvas for the paint application.
Mask off areas that will not be painted
To prevent paint from going on certain areas like windows, mirrors, headlights, and trims, use masking tape to conceal them before painting the truck.
- Can You Unmix Paint: Techniques, Consequences, Alternatives - February 23, 2024
- Does Primer Need to be Mixed? Effective Primer Application - February 22, 2024
- How to Make Old Paint Usable Again: Retrieving and Preserving Paint - February 21, 2024