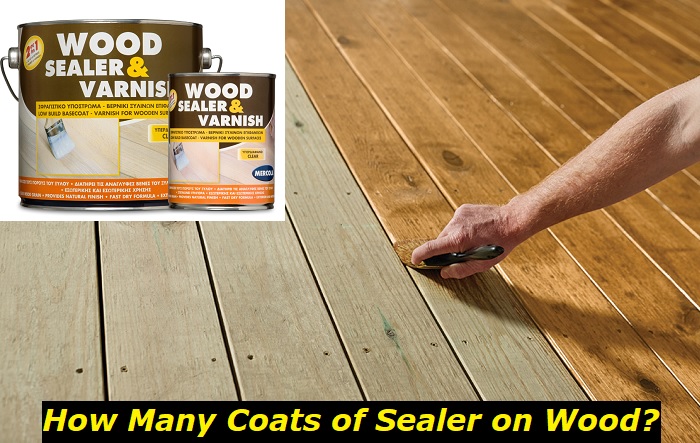
Topping off wooden flooring with coats of sealer is necessary to protect the surface and give it an attractive shine. But knowing how to apply the sealer to furniture or any surface is not enough. Following the proper technique means using the right number of coats. And this is where most people find it tough to make a decision.
How many coats of sealer should be applied to the wood to achieve that appealing shine?
The truth is that while people have different opinions on this, it is best to take the particular surface and the type of sealer you are working with into account. This way, you can make a more guided decision, rather than simply following what worked for the next expert.

Why The Type of Sealer Affects the Number of Coating
Different types of sealers produce different effects, depending on your needs. You should know these differences to understand how best to apply the coatings.
Oil-based sealers are tough and resist damage well, even more so when fully cured. The coating leaves a thick layer and this factor influences the number of coats that will be sufficient.
Having a thick formula means oil-based sealers are slow-drying and more coats increase the drying time of the project. You might want to look elsewhere if you want the project ready in no time. The sealer also contains higher VOC levels, resulting in a stronger odor and the need for proper ventilation.
You may need as many as four coats of oil-based sealer to get that super glossy finish. An additional coat may even be necessary if you notice severe surface runs and drips while working. If a high-gloss finish is not your priority, two coats should be fine. Just know you might not get a deep color with fewer coats.
Water-based sealers, on the other hand, have a mild odor and are considered an eco-friendly option due to their low VOC levels.
Because these sealers have a light formula, they dry faster, compared to the long hours of wait you experience with oil-based variants. On the downside, water-based sealers tend to be less durable and may cause the wood grain to slightly lift. Hence, the need for more sanding and extra coats. But water-based sealers are easier to work with and unlikely to drip during application.
Use up to 6 coats of sealer for best results. The surface might look appealing enough with fewer coats but you don’t want to risk ending up with a rough finish.
How Many Layers of Sealer are Suitable for Wood?
Because sealers, especially polyurethane take long to dry, variants offering quicker drying time are springing up. Some products are designed for a single coat but this can have disastrous effects. It might be challenging to get a smooth finish by applying only one coat of sealer because these products are often too thick. Sometimes, thicker than oil-based polyurethane which by itself can be tough to work with.
Even professionals will have a hard time applying sealers that thick, so they would rather opt for a regular sealer that allows them to apply multiple coats. Achieving an excellent coat with one coat of sealer is almost impossible because the surface would be uneven as it dries, leaving brush marks. Sanding and going over with another coat then have to come in to repair the damage.
If you are working on a project where getting an appealing finish is not a priority, you can go ahead with just a single coat of sealer. That should be enough to provide the desired durability, so long as the sealer is thick enough.
For a professional finish and to prevent potential scratches and dents, apply up to 4 coats of sealer on the wood. This is especially important if it is your first time working with polyurethane. You may notice some errors after applying the first coat but with additional coats, you can manage some of these mistakes.
To correct the errors, you will have to sand out the imperfections and reapply the sealer. There is always a clear improvement in the result after you’ve applied the second coat. Adding a third coat will then get rid of any imperfections left and result in the perfect finish.
Using four coats of sealer would not cause any damage to the surface especially if you are working with a water-based product. Experts sometimes recommend many layers of sealer for areas that would be exposed to high levels of moisture or traffic.
Otherwise, three coats should do the job, whether you are using oil- or water-based sealer. In cases where you are working on a refinishing project, two coats should be enough since the surface already has some finish applied. However, sanding will strip off this existing stain, so the 3-coat rule still applies if you choose to abrade.
The downside to applying more coats is that you may get to spend more time and money on the project. If you are not concerned about any of these, apply 3 to 4 coats of sealer on the wood.
Choosing the Number of Sealer Coats by Surface
Aside from determining the number of sealer coats to apply based on the type of sealer, you can let the surface type guide you. Here are some common wood surfaces and the number of coats to use on them:
- Kitchen Table
Your kitchen table will be exposed to constant use and abuse like spillage and scratching. Use up to three coats of sealer for better protection. This way, you won’t have to worry about refinishing the furniture after a short while.
- Cabinets
Applying 3 to 4 coats of sealer on cabinets should result in an excellent finish. Even though it is an indoor project, adding enough coats will make an obvious difference in the furniture’s aesthetics and surface toughness. Remember the type of sealer you are using and whether or not the cabinet has been stained also matter.
- Hardwood Floors
Floors see a lot of traffic so the coats have to be sufficient to withstand this use. Manufacturers often recommend up to 4 coats when using water-based sealers. If the product you got is not specifically made for floors, you may need more coats. Just keep sanding and applying the sealer until you get the desired finish.
- Stairs
Like floors, stairs are high-traffic areas so adhere to the same recommendations. Use at least 3 coats regardless of the type of sealer. You can keep going until the surface is smooth.
- Countertops
2 coats of sealer are ideal for wooden countertops, so long as you would not use the furniture often. You may need additional coats if you are using a water-based sealer that lifts the wood grain.
Do You Need to Sand After Applying the Sealer Coats?
Determining whether or not the surface needs sanding between coats can be tricky since manufacturers provide different recommendations for different products. Sanding can be time-consuming but consider the following benefits you can enjoy by not missing the step:
- Avoids dust from getting trapped
It is a common occurrence to notice dust and bubbles in lower coats after application but you can prevent this by sanding between coats. Dust particles may be the result of beginning work on dirty wood or working in a dusty room. Either way, sanding can help get rid of these imperfections.
Leaving the dust and bubbles trapped makes your finished work look dirty and cleaning cannot fix this. You don’t want all that energy spent on the project to be wasted.
- Benefits adherence
Oil-based sealers often contain substances that can interfere with the bonding process of chemicals. With paint, it is a simple matter of applying one coat over another after the first dries. Sealers aren’t this easy to work with so sanding prevents coats from sitting atop one another without penetrating.
Poor adhesion causes the topcoat to peel off eventually and this can be frustrating.
- Prevents brush marks
It is way too common to see brush marks after applying coats of sealer. This has more to do with your painting technique mostly than the product used. Normally, oil-based sealers level and the brush marks disappear but sometimes, this never happens.
Sanding between coats is important especially if you are using a thick product. Immediately you notice brush marks, sand lightly, and reapply the sealer.
Conclusion
As few as 2 coats of sealers are often enough to protect the wood but with extra coats come added protection. The downside to using too many coats of sealer is that your project takes longer to dry. Try not to exceed four coats for most types of wood surfaces to avoid discoloration. You now know how many coats of sealers to use on your project.
All that is left to result in an excellent finish is perfecting your application skills and using the right product.
- Can You Unmix Paint: Techniques, Consequences, Alternatives - February 23, 2024
- Does Primer Need to be Mixed? Effective Primer Application - February 22, 2024
- How to Make Old Paint Usable Again: Retrieving and Preserving Paint - February 21, 2024


