If you find a nail hole or crack on any surface in your home, you want to fill it immediately. DryDex Spackling is a perfect solution for such repairs. It is versatile and easy to use on different types of surfaces. However, you know that you need instructions for excellent results.
You are in the right place. This guide outlines the recommended uses of DryDex, dry time, and the proper application procedure. We will also tell you the tools and gear that you need for the repairs. Let us get right to it.
What is DryDex Used for?
Have you noticed ugly cracks, dents, or holes on any surface in your home or office? DryDex spackling is the go-to solution for repairing holes and cracks. You can use it to repair different surfaces, including plaster, wooden walls, drywall, bricks, and stones.
You can also use DryDex to correct errors on interior and exterior surfaces. Sometimes DIY and professional repairs leave even or sunken spots. A tube of DryDex will smoothen out such surfaces.
DryDex has many advantages over other solutions, including a short dry time and multiple uses. You are assured that the fill will not shrink or sink after application. Hence, you can repaint or coat the surface with durable paint and forget about it for years.
A DryDex coat does not crack or flake. When you apply and allow it to dry properly, the smooth coat remains for a long time. DryDex is easy to sand when dry and can take any paint that you prefer. In addition, you do not need to use a primer when painting over DryDex.
You can choose the size of the tube that matches your repairs. The formula is easy to use, even for DIY repairs, and has a shelf life of one year. DryDex spreads easily on the recommended surfaces. Hence, you can save money on repairs and get professional-like results.
How Long Does DryDex Take To Dry?
Time is an important consideration when repairing any part of your house. Apart from the obvious need to make the best of your day, you need the house functional as soon as possible. The house should be habitable at least by the end of the day.
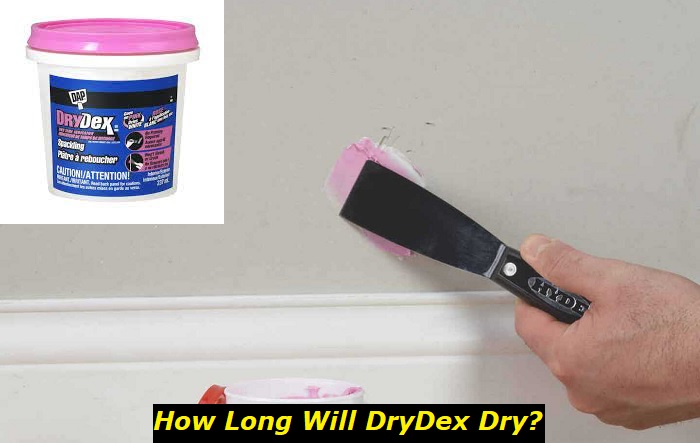
Luckily, DryDex has a short drying time. Most repairs require one coat, which dries within 1 and 5 hours. The duration may vary with the temperature, number of layers or depth of fill, and humidity.
The manufacturers recommend that you apply DryDex spackling when the temperature is at least 500 F. You can schedule your repairs based on the weather forecast in your area. Another important tip is to start your repairs early in the morning.
Sometimes cracks or holes that need a fill require more than one layer of DryDex. In this case, you need to allocate more time for the repairs. It is advisable to repair one room or floor at a time if you have many broken parts.
One advantage of using DryDex spackling is that it has a dry time indicator. The paste is pink when you apply it but it turns white when dry. Hence, you can tell when it is time to sand and repaint the surface.
How to Apply DryDex for the Best Results
DryDex manufacturers have made it so easy for experts and DIY enthusiasts to use the product. You do not need any experience with interior or exterior repairs to use the solution. Follow the instructions below for smooth and long-lasting DryDex layers.
1. Pick the right time for repairs
You need to pick the right season to repair cracks and dents in your home. The ugly site may aggravate you, but you want the best results with every repair. We talked about the temperature requirements for DryDex being at least 500F.
In a cold season like winter, it is better to wait a little bit for the season to change, especially for exterior repairs. Alternatively, you can heat the room if you are doing minimal interior repairs. However, it is fun to do it on a sunny day.
Another consideration for exterior repairs is the rain pattern. You may be in a warm but rainy season. Avoid using DryDex on exterior surfaces if the weather forecast includes rain within 24 hours of application.
DryDex dries fast, but it requires a day or two to settle in, especially when you apply several layers and coat it with paint or any other finish.
2. Prepare the damaged surface
If the weather is right, move on to the next step and clean the surface. Remove all dirt and any foreign materials in the cracks or holes. Consider a blower for deep cracks if you suspect that dirt has accumulated. You may also find bugs and insects hiding in cracks.
Use a light to check the deep cracks after cleaning to ensure that the surface is clean. For exterior surfaces on walls and fences, you can use a pressure washer to remove all the debris. Give the surface enough time to dry, or use a heat blower to speed up the process.
3. Prepare the formula
DryDex is ready to use when you buy it, but you need to stir it up to get an even consistency. Stir the contents of the can thoroughly and ensure that you reach the bottom. If you buy the formula in a tube, knead the tube thoroughly before opening it.
4. Apply DryDex and Sand
Your formula is now ready to use. Pick a clean putty knife and apply DryDex Spackling to the clean surface. Ensure that the paste reaches the bottom of the hole or cracks. You can change the knife and use a different tool to ensure that you fill the space.
You will need to spread two or more layers if the dent or hole is deeper than an eighth of an inch. The first layer must be dry before you can add a new layer. Another useful tip is to wet the putty knife when spreading the DryDex layer to achieve a smooth finish.
You can tell that the first layer is ready for another layer or finish by the color. The applied paste will turn white when dry. Apply the next layer and wait for it to turn white as well. Keep spreading layers until you cover the open space completely.
Sand the coat after the last layer turns white. Experts recommend wet sanding instead of the usual sanding to prevent dust. However, you can use standard sanding paper for minor repairs. Use a mask, in this case, to avoid inhaling dust.
5. Coat or repaint the surface
It is always advisable to add a protective finish after repair, depending on the extent and nature of the repairs. A new coat of paint may be necessary for a consistent finish on the wall or floor. You can paint the repaired spot or the entire wall for several or large cracks.
Immediate repairs are recommended when you notice a hole or small dent on any surface. You will save money on the filler and paint.
Additional Applications Tips and Instructions
Following the right application procedure guarantees you professional-looking results even when filling large cracks. Here are additional tips for your safety and outstanding results of DIY repair projects.
1. Wear protective gear when applying DryDex
Do not ignore protective gear, especially the facemask, goggles, gloves, and protective clothing. The repair may be minimal, but a small mistake can lead to serious health conditions. For instance, dry sanding produces dust that can cause respiratory conditions when inhaled.
The dust may also cause irritation if it contacts your eyes or skin. The filler is also harmful if ingested or swallowed. Keeping the mask on reduces the risk of ingestion.
2. Keep the doors and windows open for indoor repairs
You need enough circulation to breathe in fresh air and to speed up the drying process. DryDex has a mild smell, but you still need the fumes to escape immediately.
3. Clean the tools immediately
DryDex is sticky and hard to clean when dry. You will need to sand or scrape a dry layer if you allow it to dry. Wash the tools and can or tube with enough water immediately after application to avoid scraping your tools.
4. Seal the can or tube tightly
Contamination causes DryDex to lose the color indicator and consistency. Close the tube cab or the lid of the can tightly before cleaning any spills. The filler has a shelf life of a year when stored properly.
Conclusion
DryDex Spackling is one of the best fillers you can buy to repair cracks, dents, nail holes, and other similar damages. The formula is fit for wood, concrete, stones, bricks, and drywall. The filler comes ready to use. You just need to mix it and apply it on a clean, dry surface.
The filler takes 1 to 5 hours to dry. It will change from pink to white when dry. You can then apply an extra layer if needed or coat it with high-grade paint or finish. Protective gear is necessary to avoid touching, breathing, or ingesting DryDex dust when spreading or sanding.
- Can You Unmix Paint: Techniques, Consequences, Alternatives - February 23, 2024
- Does Primer Need to be Mixed? Effective Primer Application - February 22, 2024
- How to Make Old Paint Usable Again: Retrieving and Preserving Paint - February 21, 2024


