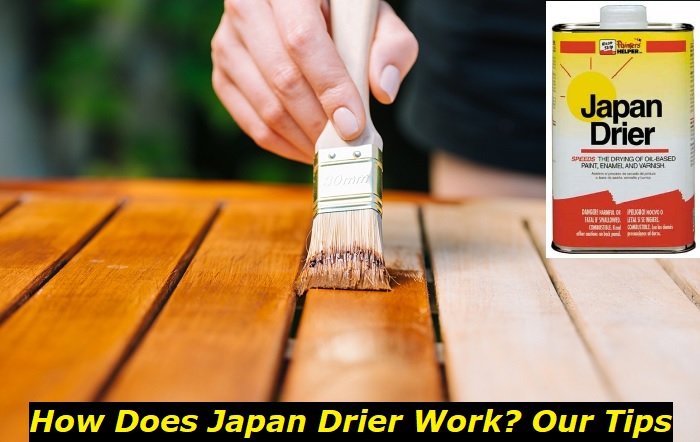
Today, we will be talking about the ‘Japan Drier.’ More specifically, how the Japan Drier works. Japan Drier is a unique blend of lead-free drying agents that hastens the drying time of oil and oil-based finishes.
Japan Drier reduces the likelihood of dust getting into the finish and enhances the product’s brush marks and gloss. While these are incredible benefits of using the Japan Drier, excess use can darken the product and cause it to crack. Hence, a measured amount should only be added to the amount of product being used. However, there are things to know about the Japan Drier and how it works.
This article will share how the Japan Drier works. You’ll also get tips for the best results when adding this metallic salt to varnishes.
What is Japan Drier?
Japan Drier is a layman’s term for any oil drying agent, but the most popular oil drying agent is 97% Naphtha and 3% Cobalt compounds. It acts as a catalyst and is used with oil-based enamels and varnishes. This metallic salt is essential in a finisher’s cabinet and is designed to provide a smooth gloss to the product to which it is added.
Many times, the Cobalt compound used is Cobalt linoleate or Cobalt naphthenate. It can be mixed with drying oils like boiled linseed oil and alkyd resin paints to harden it and can be beneficial for increasing the storage life of oil-based finishes and varnishes.
Painters use Japan Drier to accelerate curing more commonly than furniture makers, who avoid using it if an unknown oil has been added to the wood.
How does Japan Drier Work?
Japan Drier catalyzes free-radical autoxidation of drying oils with air. It joins molecules and hardens drying oils. This chemical reaction produces organic plastic that is smooth, firm, and long-lasting in a shorter time.
It is known as a primary drier since the oxidizable vehicle, Cobalt, when used alone, will cause the surface of drying oil to set to a near solid. At the same time, the underlying film does not reach the advanced oxidation stage. Therefore, if used in measured portions, the oil-based finish or varnish gains a glossy look; otherwise, a defect known as ‘wrinkling’ occurs, and the film cracks.
The reaction occurs automatically at ambient temperature and, after drying, does not re-dissolve in the original solvent. While Japan Drier is effective for hardening oil-based finishes and varnishes, it does not work in oil-based products that form a film by another chemical reaction caused by epoxies, urethanes, and baking enamels.
What Kind of Oils is Japan Drier used with?
Japan Drier is an excellent choice for various projects and works with a wide variety of oils that do not contain any conflicting salt or metal. It works with boiled oils, blown oils, yellowing oils, and non-yellowing oils, including Tung oil (not 100% pure), Oiticia oil, Fish oils, Safflower Oil, Sunflower oil, Soybean oil, Cottonseed Oil, Dehydrated Castor oil, and Tall oil.
It does not work well with light-colored oil paints as they can change the color, form, and texture over time. Therefore, it is preferably used with darker pigmented paints where the effects will not be easily noticed.
The autoxidation reaction with this wide variety of drying oils makes it worthwhile among woodworkers and DIYers who use it to hasten the curing time of a product when there is no time. For example, with a drier, a lacquer that takes 3-4 months to dry will harden in a week or less. However, suppose it is not necessary to rush a project. In that case, most woodworkers and DIYers prefer to allow the oil finishing or varnish to dry on its own due to the toxicity of Cobalt, an ingredient of Japan Drier.
How to Apply Japan Drier?
You now know a little bit about Japan Drier, why you might use it and how it works. Next, it is time to consider how to apply it. The first thing to consider is the oil-based finish or paint you will be working with. If it has started forming a film on its own or due to the presence of another catalyst, then do not add Japan Drier.
Also, consider the surface on which the drying oil or paint will be applied. If an unknown oil has already been used on the product’s surface, avoid applying Japan Drier to avoid damaging the product.
If you decide to use Japan Drier, add to the oil-based finish quickly. This reduces the wetness of the film and prevents dirt and debris from sticking to it.
When ready to use your oil-based paint or varnish on your product, make sure it is darker pigmented so the discoloration caused by Japan Drier is obscured. Apply at least three coats of varnish or paint depending on the glossy sheen you desire, and wipe away any excess oil. Following are some general guidelines for using Japan Drier:
- Before using, read the directions and safety precautions. Do not add more than what is advised. The normal amount to be added to your varnish or oil-based paint is 5%.
- Some paints dry on their own. Due to the toxicity of Japan Drier, only use when needed.
- There are other varieties of Japan Drier that use Zinc and Manganese compounds. Only add one type of drier to the paint.
Once the Japan Drier has been applied and the oil starts curing, you can move to the next batch to complete the process.
The Step-by-Step Instruction for Applying Japan Drier
Now you know what a Japan Drier is, how it works, and how to use it. Next, let’s take a look at our tips for getting good results when using Japan Drier:
- First, make sure you have the oil-based finish or drying oil ready to use. Usually, you would have to apply up to three coats but wait for each layer of film to dry before you do light sanding, which can take hours or weeks. Also, make sure there is no solvent already added to your varnish. Avoid products with ‘fast-drying’ as a feature. It is an indication that a drying agent may have been added already. If a diluted drying oil is used, it will cause a defect known as ‘wrinkling’ while the film sets and cause the finished product to crack. To be safe, add 5% of Japan Drier to the undiluted oil-based finish you will be using, wait a few hours or at least 24 hours before doing the first light sanding, depending on the drying oil used.
- Use a measuring cylinder to determine how much Japan Drier is needed for the product and a canister to collect the oil-based paint or finish you will use. Add Japan Drier to oil-based paint or finish and mix thoroughly with a brush or small stick. You will notice gelling in the canister and an enhancement of brush marks.
- Get your wood ready. The process for this step differs depending on the condition of the wood available. If the wood still has a nice layer of old paint, it can comfortably handle a new coat of paint. The only thing to do is clean the wood surface with trisodium phosphate (TSP) and bleach solution. This breaks down the glossiness of the previous paint and creates a good bond between the surface and the new finish. It will also kill off any mold spores and remove stains. If you have new wood available, treat it with fungicides, sand all the edges and surfaces lightly to smooth the grain, and apply primer to remove the sanding dust. If some parts of the wood are damaged, treat it with fungicides and pesticides to kill off the spores.
- If applying primer, apply in thin coats and use a high-quality roller or brush. Using cheap products while working reduces the quality of the finished product and can shed fibers that ruin the paint job.
- You should want a semi-glossed finish first. If that does not happen after applying the first coat of oil-based finish with Japan Drier, you will have to do the initial sanding and apply another coat. Keep testing, if possible, with another finished product by the side so you can see the kind of result expected.
- The time it takes for the second coat to dry after light sanding might differ from the time it took the first coat to dry. Therefore, it will take more time but if the glossiness is still not achieved, apply a third or fourth coat.
- You might want to use boiled linseed oil to cut the time. Some other drying oils require many coats to achieve the sheen and glossiness of a superbly finished product.
Follow these tips and get good results when adding Japan Drier to an oil-based finish or vanishing and using it on a product. As long as you prep the wood neatly and adequately apply each coat after waiting for the drying time to elapse, it is not difficult to get good results.
With that said, we will wrap things up now and, as always, wish you luck on your project.
- Can You Unmix Paint: Techniques, Consequences, Alternatives - February 23, 2024
- Does Primer Need to be Mixed? Effective Primer Application - February 22, 2024
- How to Make Old Paint Usable Again: Retrieving and Preserving Paint - February 21, 2024


