Imagine taking a well-deserved rest after a long day only to notice cracks on your ceiling. Your first thought will likely be how to get rid of them. Instead of you trying to patch the imperfections with a quick fix it’s best to give your ceiling a fresh covering.
Is your ceiling cracked? Are you looking for a suitable ceiling filler to restore your ceiling to its former glory? You are likely to be confronted by a multitude of options once you get to the hardware store. How do you select the right one? How should it be applied to ensure the repair job does not come undone sooner rather than later? A million little things could go wrong in a DIY project.
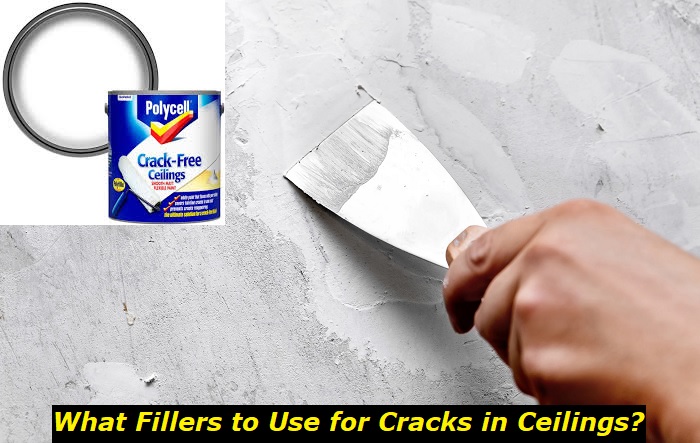
Do not worry. We’ve got you! There’s a variety of ceiling filler options. Your safest bet would be choosing flexible fillers as they are more effective for ceilings. Read on to identify adequate and effective ceiling fillers and how to use them. By the time you’re done with this article, you’ll know the best course of action. You will learn more about:
- Types of flexible ceiling fillers
- The pros and cons of various ceiling fillers.
- How to apply these ceiling fillers
- Handy tips to consider when applying any type of sealer
Types of flexible ceiling fillers
1) Joint compound
It’s also known as drywall mud and is a multipurpose, frequently used material. Provided as powder, it must be combined with water to produce a suitable consistency for use.
Joint compound is specifically made for filling and completing joints between ceiling panels. Therefore, it is suitable for paneled ceilings.
Pros:
You can apply it smoothly to many surfaces and is simple to work with. Moreover, it is reasonably priced.
You can also sand and paint over it, and it has strong adhesion.
Cons:
It’s less adaptable than other fillers, so it may need additional coats.
You may need several applications and takes a while to dry.
If applied improperly or if the ceiling moves, it may eventually crack.
2) Acoustic sealant
This particular filler is frequently used to seal cracks and joints in ceilings. It lessens sound transmission so, it’s ideal for use on ceilings in soundproof rooms.
Pros: it has excellent soundproofing qualities, exceptional flexibility that allows for movement without cracking, and ease of application.
Cons: It might not be as effective at repairing large gaps or cracks.
3) Expanding Foam
This sealant normally comes in aerosol cans and is applied as a liquid that, when in contact with air, rapidly expands and solidifies into a foam.
Pros:
The expanding foam works well to fill wider gaps and holes in your ceiling. It blocks out noise.
It adheres to most surfaces, particularly those with irregular shapes and uneven surfaces. This makes it suitable for decorated ceilings
Cons:
You should manage its quantities carefully because it grows rapidly after application. If you apply it improperly, it can be messy and challenging to remove.
4) Caulk
You can use this versatile substance to fill ceiling seams and tiny cracks. There’s a variety of caulk, including silicone, latex, and acrylic.
5) Acrylic caulk fillers
These fillers are usually available in paste form.
Pros:
Acrylic caulk is a flexible filler that you can use in various applications.
It is strong and simple to use. Once dry, you can sand or paint over it and it cures quickly.
Cons:
During the curing phase, acrylic-based fillers may shrink as they dry and harden, leaving gaps or cracks in the area it has filled. This will unfortunately set you back.
They are prone to dampness and absorb moisture. Hence their strength and adherence are jeopardized if you use them in areas with high humidity levels.
They barely resist high temperatures. Consequentially, when you subject them to high temperatures, they may soften or deform, thus restricting their usage in applications that call for heat resistance.
6) Latex-based Fillers
These are water-based fillers that work well for repairing minor cracks and openings in ceilings.
Pros:
They are very flexible and you can apply them easily.
Cons:
They have longer drying durations compared to other types of fillers, so it may inconvenience you if need to finish a project fast.
As they dry, latex fillers frequently shrink. As a result, the filler’s volume diminishes and it is not as tough or long-lasting as other fillers.
It’s not recommended for highly moist environments and it’s incompatible with some paints.
It may cause you an allergic reaction if you have a latex allergy.
Unfortunately, it has restricted usage so you can only use it indoors.
7) Silicone-based Fillers:
These fillers are efficient for covering ceiling cracks in humid areas. This makes them ideal for bathroom or kitchens ceilings
Pros:
They’re very flexible and resistant to moisture so you can use them in highly humid areas.
Cons:
Due to its silicone nature, it’s incompatible with paint.
It takes much longer to dry than other caulks.
It’s relatively expensive.
How to apply them
1) Joint Compound
- Prepare the ceiling surface by cleaning. Use a putty knife to apply a thin coat and ensure you fill all the crevices.
- Use the putty knife to smoothen the material.
- Let it dry then add more coats if necessary. You can then sand the surface to have a clean finish.
2) Acoustic sealant
You can apply this sealant directly to the creatives on your ceiling with either a putty knife or a caulk gun. Then smoothen the surface and let it dry.
3) Expanding form
When using this foam, shake the can vigorously and screw on its application nozzle.
Carefully apply the foam into the cracks while holding the spray can upright. It will expand in the space so use it sparingly. You should then wipe off the excess before it dries. Allow it to dry then sand the surface for a smooth finish.
4) Acrylic Caulk
Clean the ceiling area to get rid of loose dirt. At a 45-degree angle, cut the tip of the caulk tube then connect it with a caulk gun.
You can then apply the caulk to the crevice and cover it completely. Smoothen the caulk and wipe away the excess. You can then paint over it afterward.
5) Latex Filler
clean the area around the crack and use putty to apply the filler. Smoothen the surface and wipe off the excess. Let it dry then sand it before painting for a clean finish.
6) Silicone-based filler
- Clean the area around the crevices to get rid of loose debris. At a 45-degree angle, cut the caulk tube and connect it to the caulk gun.
- Apply the caulk into the crevice as neatly as you can. Smoothen the caulk using a silicone caulking agent and wipe off the excess.
- You should allow it to dry sufficiently as it usually takes 24-48 hours
What else should you consider?
Whichever sealer you deem appropriate for your ceiling, its effectiveness hinges on proper application. If you want to ensure your home retains or increases its value, it is always best to have major repairs and home improvement projects by licensed and insured professionals. This way if something does go wrong, you will not have to through good money after bad. They will correct the ineffective repairs free of charge.
If you cannot afford to hire licensed contractors, you are better off doing it yourself than hiding unlicensed repairmen. Not only will you assume liability should they get injured on your property, but you also have legal recourse should their repairs prove ineffective.
When repairing the cracks on your ceiling without professional help, ensure you select the most appropriate filler. Read the manufacturer’s instructions keenly and ensure you have everything you need before getting started. Protective gear and proper equipment will go a long way in ensuring your repair job looks neat and last as long as would be reasonably expected.
Working overhead is quite challenging. Not only will your neck, shoulders, and arm beg for sweet relief. Ensure you stand on a sturdy A-frame ladder to avoid falling over. Do not strain to reach far-away spots. Get down the ladder and move it into the proper location. The last thing you need is to suffer personal injured and expensive hospital bills in an attempt to save money on ceiling repair.
Conclusion
Repairing imperfections on walls is a walk in the park compared to ceilings. But fret not, as a well-informed homeowner you’re sure to make some smart choices so it won’t be all that difficult. Just ensure you follow this guideline and the literal pain in the neck will all be worth it when you see your final product.
- Can You Unmix Paint: Techniques, Consequences, Alternatives - February 23, 2024
- Does Primer Need to be Mixed? Effective Primer Application - February 22, 2024
- How to Make Old Paint Usable Again: Retrieving and Preserving Paint - February 21, 2024


