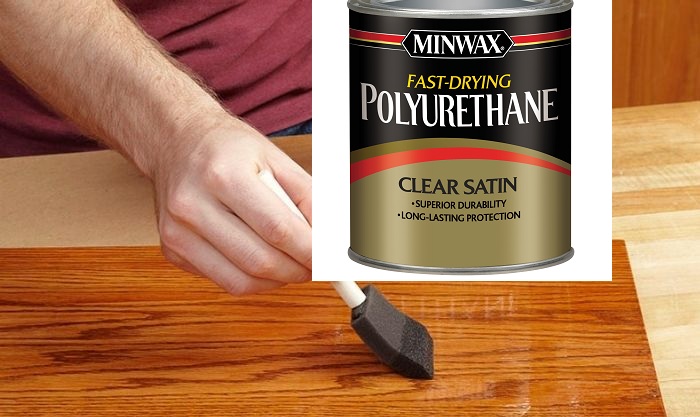
Applying polyurethane as well as many other finish types is not that easy. You will have to follow some rules and check the results after every single step. Experienced woodworkers will say that it’s an easy task because they know pretty well how to work with poly and how to make it look good on basically any surface. But those who don’t have so much experience may get into a bad situation.
Today, we’ll be looking precisely at the first coat of polyurethane and some problems that can make it look bad. We’ve already told you a lot of secrets that we use in our projects when we apply polyurethane. But now it’s time to talk about some problems that occur when you apply poly and you don’t know if the next coat will hide these problems.
In this article, we’ll be talking about the following:
- Why can polyurethane look bad?
- What can happen with your first coat after you apply it?
- White spots on polyurethane after the first coat.
- How to deal with bad-looking polyurethane on wood?
Let’s get started!
What can happen with your first coat of polyurethane?
The first coat of poly is very important. You should prepare all materials and do the preparation job with your wood. Otherwise, you will just spend your time and money and will need to redo the job once again. Experience is the best teacher in woodworking, but you may avoid getting into trouble if you just read our article carefully. Why don’t you just use our experience instead of making your own mistakes?
So, when people ask us why their polyurethane looks horrible, they then provide different descriptions of what they mean by “horrible”. And we are always surprised by how many variations of these bad changes can happen.
We’ve found out that such changes are possible:
- Polyurethane is getting white. Usually, poly is getting some white spots when it is applied on a wet surface. Or the conditions of your workshop are bad – high humidity levels will lead to white spots on polyurethane.
- The surface that yesterday looked smooth and nice, is now all in scratches. It’s hard to find the reason for this because we can think of different reasons. It can be about the expired poly, but usually, it’s all about bad wood preparation.
- Little bumps on the surface. After turning white, this is the second most popular problem with polyurethane. Usually, this happens because the water-based polyurethane tends to raise the grain of the wood. You should sand the bumps down and recoat the project.
- Different color spots. It may happen very often that one part of your project is darker than the other parts. It means that you didn’t do a good job when applying polyurethane. Most likely, you used too thick coats that are now turning dark.
- Small tracks are visible all over the project. One more claim that we often hear from woodworkers with little or no experience is that the tracks of a paintbrush are seen. Don’t use the paintbrush or thin the polyurethane more to avoid this.
As you see, we can name a lot of problems that often have different reasons. It’s hard to say whether your mistakes are critical or not. In most cases, you can do something to save the project and not redo the job completely. But sometimes, it’s really better and easier to sand the poly down and redo the job after reading some tips and rules.
So, we can name some most important mistakes that people make when using polyurethane on wood:
- covering wet wood with poly;
- not ensuring the best humidity level in the workshop;
- using paintbrushes;
- not thinning polyurethane;
- applying poly in thick layers;
- not letting one coat dry before putting another coat;
- bad wood preparation;
- bad poly type choice.
This is not the whole list of problems and mistakes we can think of. But we believe it will show you which problems are the most popular and you then can avoid the mistakes just by remembering that other people made them and needed to spend hours to save their projects.
How to get rid of any problems with the first coat of polyurethane?
If you have made a lot of mistakes in the way you were applying poly, you will need to redo your job after sanding down the polyurethane. But in most cases, you can save the project just by following some tricks. It’s not all about the hard tasks, but be prepared to spend some hours saving your woodworking project.
For example, you can get rid of white spots just by using a professional or even a home hair dryer. This equipment will help the water evaporate even through the polyurethane coat and you will not need to redo the job. It doesn’t help in all situations, but if the white spots are not huge, you can rely on this method.
Then, if you have some dots or bumps on the project, you will need some fine-grit sandpaper. The sandpaper will help you get rid of these defects and will let you work with a smoother surface. Don’t forget to work with sandpaper only after the first coat of poly is fully cured. Also, apply another coat right after you finish.
Sometimes, the dust is to blame for the problems with your poly. In this case, you can also use sandpaper to get rid of all problems.
In case you have applied too thick coats of polyurethane, you will probably need to sand it all down and then prepare your wood once again and apply poly with optimal coats. Make sure you use appropriate instruments for this.
You should be careful at every step. Sometimes, some absolutely silly mistakes can lead to problems with your project that will require days and even weeks to solve.
How to apply poly and avoid problems?
You should understand that not all kinds of poly are OK for all kinds of wood. You will have a choice between oil-based and water-based poly. In most cases, the oil-based option is better as the first coat. It will not raise the grain of the wood and it will cure faster creating a more homogeneous coat.
The choice of instruments is also important. It can be a brush or even a rug. But be careful – not all types of brushes will be OK with polyurethane. Some of them will create visible tracks and other problems.
Here are some important tips to follow:
- Humidity control. First of all, remember that polyurethane can only be applied on a dry surface, any wet surface will eventually be covered in white spots. Also, humidity control in the room where the project cures is an important factor.
- Quality of materials. It’s not only about the type of your poly. It’s also about the quality. For example, an expired product is always a bad idea and you can’t predict how it will work out on your project.
- You shouldn’t let polyurethane cure at low temperatures – it will take weeks until you can apply the second coat. Also, high temperatures are not recommended because of too fast hardening.
- Layer thickness. You should always make sure that the coat is thin. If you apply thick coats of polyurethane, you will not get homogeneous color and structure. The project will look awful.
- A number of layers. Polyurethane is not the product that gives you better results with every layer. Usually, two to four coats are OK. But applying over 10 coats makes the project uncontrollable in terms of what color it gives in the end.
- Unfortunately, all private woodworking workshops have a lot of dust. And this dust sticks to the freshly applied polyurethane. After some time, you will need to sand the poly a little with fine-grit sandpaper to get rid of problems.
These are the most important factors that will allow you to get rid of all problems and avoid them on your project. Sometimes, these tips will save weeks of your work and will allow you to finish the project much sooner.
Be careful with cheap products when you apply polyurethane. For example, cheap poly may need additional thinning with some thinners and spirits. You will have to be a professional woodworker to prepare them. And also they cure and form an unpredicted surface with possible problems.
Final words
Polyurethane is a very popular way to deal with woodworking projects. Poly covers the natural wood, makes it more beautiful, and gives some stains. Also, a couple of coats of polyurethane will protect your wood from many problems like damage, water impact, etc.
If you want to have a professional result with your woodworking project, you should apply polyurethane following some simple rules. Otherwise, you better save this article somewhere to consult it when you need to get rid of problems after applying your first coat of polyurethane.
- Can You Unmix Paint: Techniques, Consequences, Alternatives - February 23, 2024
- Does Primer Need to be Mixed? Effective Primer Application - February 22, 2024
- How to Make Old Paint Usable Again: Retrieving and Preserving Paint - February 21, 2024


