When starting a painting project, many DIYers wonder, “Do I need to clean drywall dust before priming?”
You need to clean drywall dust from off the wall before priming. Leaving dust on the drywall before priming causes paint adhesion problems. If you fail to clean drywall dust before priming, the dust will prevent the paint from sticking to the wall, and the paint will begin to peel off soon.
Failing to clean the dust off the drywall before priming will also cause paint lumps and dumps on the wall. The dust on the corners will cake and make the corners rounded instead of being well-defined. It would be best to eliminate the dust for well-defined corners.
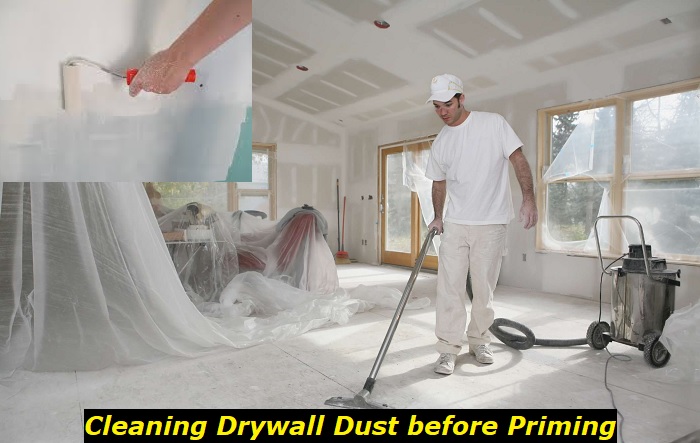
Now that you have learned the short answer, here’s an article that discusses what to consider when cleaning the dust.
This article will ensure that you get a good finish at the end of your paint job. Read on to find out more.
What To Consider When Cleaning Drywall Dust Before Priming
The most important things to consider are:
- How to clean the drywall dust in the fastest and most effective way possible.
- Safety measures to handle the dust.
These are discussed in detail below:
How Best to Clean the Dust
How best to clean the dust is one of the most important concerns to consider when cleaning drywall dust.
The best way to clean is to start from the ceilings, followed by the walls, and finally, the floors. You want to follow the ceiling-wall-floor order because it saves you time and gives you the advantage of gravity.
Dust from the ceiling settling on the walls will be taken off the walls when you clean the dust off the walls.
Finally, all the dust and particles from the ceiling and the walls that settle on the floor will be cleaned off when you sweep and vacuum the floor.
This way, you will not have to repeat any cleaning process since gravity works in your favor to settle the dust on the next place you are going to clean.
1) Start With the Ceiling
When starting from the ceiling, you want to place your dust mop on the far back corner of the ceiling.
Place it tight into the crease where the ceiling meets the wall and clean gently from that end of the ceiling to the other end of the ceiling.
Once you get to the other end of the ceiling, you want to turn the dust mop and go all the way back to the starting point, making sure you cover all that square footage.
If you are using a big swiffer or dust mop, you can afford to clean the ceiling of the entire room before wringing it outside to get rid of the collected dust.
But if you are using a small dust mop or swiffer, it is recommended that you wring it outside to get rid of the collected dust after every room’s ceiling.
2) Clean The Walls
The best way to clean the walls is to approach them the way you cleaned the ceiling. You want to start from the top.
Place your swiffer or dust mop at the top of the wall and go across with it tightly from one end horizontally to the other.
When you get to the end, you want to go down a foot or two and back across till you hit the corner from where you started.
You want to repeat this process until you successfully cover the whole wall.
3) Taking Special Care of the Corners
Dust mops and swiffers work great, but they can not clean the dust in the corners between walls and the creases where the walls meet the ceiling. For these corners, it would be best to use a brush.
You must clean these corners. If you don’t, the dust will make the corners cake and look rounded after your paint job instead of taking a definitive and sharp corner when you paint.
You do not need any special brush for this. A cut brush or any normal paintbrush will do.
You want to go in with the brush as though you were painting the corners and knock off the dust from there. Swipe the brush left to right and vice versa to get the dust off the drywall corners and the creases where the walls meet the ceiling.
Tip
From the experience of many paint professionals, it is always best to blow the ceiling and the wall with a leaf blower. You can use either an electric leaf blower or a battery-charged blower, but you want to blow in the same order as you did when mopping off the dust.
You want to start from the ceilings first, followed by the walls. Ensure to begin from the corner of the ceiling and blow all the ceilings before moving to the walls. When you move to the walls, ensure to start from the corners before blowing all the walls.
You’ll see some dust come off. This step may be discarded, but removing the extra dust from the ceiling and the walls is necessary for a perfect paint job.
But this is only recommended if the temperature is 55°F and above. If the temperature is below 55°F, blowing is not recommended.
4) Vacuuming the Floors
After knocking off all that dust from the ceiling and walls, the next place you want to focus on is the floor.
Again, the floor is the last place you want to focus on because gravity will make all the dust and particles you cleaned from the ceiling and the walls fall on the floor.
If you do not follow the ceiling-wall-floor order, you may have to clean the floor more than once. That can be stressful and time-consuming.
You can use a vacuum cleaner or a shop vac to clean the floor. But many DIYers and paint professionals usually sweep the floor before using the vacuum cleaner.
If you are using a vacuum cleaner, it would be best to first sweep the floor.
But if you are using a shop vac, you can vacuum immediately without sweeping the floor. Shop vacs are more powerful than home vacs and can suck up more dust and particles better than traditional home vacs.
Tip
To avoid particles and dust on your roller as you paint, it is advisable that you vacuum out all of the outlets and switches.
Vacuum out all the debris in the outlets and around them. You may have to use a screwdriver or other handy tool to dislodge any stuck debris.
If you skip this step, your roller will collect all that debris when you hit it with the primer. It is also possible that some of that debris and particles will end up in your paint. So it would be best to vacuum all that debris out before priming.
Safety Measures
Apart from the fastest and most effective way to clean drywall dust, safety is another important thing you want to consider. Since you are dealing with dust, it would be best to do the following:
1) Wear A Respirator
The possibility of respiratory issues is a serious concern to consider when cleaning drywall dust. You must use a respirator to ensure that you do not get dust in your lungs or nostrils.
Although a mask may work, it would be best to use a respirator instead. Respirators offer better air filtration and protection from dust than make-shift cloths and face masks.
But you must wear it properly the whole time while working on the drywalls.
Failure to protect yourself from the dust can lead to breathing problems and serious respiratory diseases.
Fine dust particles can build up in your lungs to make breathing difficult and cause obstructions in your chest.
2) Wear a Bunny Suit
Although many paint workers usually save the bunny suit until they apply the primer, it is always best to wear a bunny suit while cleaning the dust from off the walls.
The bunny suit will prevent dust stains and particles from getting stuck on your clothes. You do not have to wait until you apply the primer before you wear your bunny suit.
Bottom Line
A good paint job requires a lot. One of the most important things to consider if you want a flawless paint job is prepping the drywall, and this step involves cleaning the dust off the drywall.
The same applies to ceilings. You must clean in the order suggested above because it lets gravity work in your favor to make cleaning easier and more effective.
If you fail to clean the drywall dust, you will end up with paint lumps and dumps. You will also have rounded corners instead of well-defined corners, and the paint will peel off in no time due to the adhesion failure caused by the dust.
But you must remember to wear a respirator while cleaning the dust, so you do not develop respiratory issues breathing the dust.
- Can You Unmix Paint: Techniques, Consequences, Alternatives - February 23, 2024
- Does Primer Need to be Mixed? Effective Primer Application - February 22, 2024
- How to Make Old Paint Usable Again: Retrieving and Preserving Paint - February 21, 2024
