Contemplating whether to sand your automotive sealer or not may give you quite a hard time as it may be tricky. Instead of getting stuck between the two options, this article has been drafted to guide you on the right choice to make.
In this article, you will learn if sanding your automotive sealer is a great choice or whether it isn’t and if it is, how you can accurately sand it.
What is a Sealer?
A Sealer is a stretchy or elastic compound that serves as an absorber at the junctions where materials are joined together in automobiles, switchboards, and other structures.
Sealants are designed to withstand various collisions to hard impacts, increase and decrease in sizes, and also designed to last long irrespective of temperature and conditions like rust, exposure to water, and so on.
If you’ve been having difficulty getting your paints to stay put while painting, applying a sealer is the solution you need. Using a sealer will cause your top coat paints to stay permanently without falling off or washing away after you apply them on surfaces because it fosters the union between a well-sanded primer and the basecoat paint.
Sealers also help in covering up scratches on surfaces while clearing off every other form of deformities as well as in the recuperation of sanded edges.
Asides from the listed benefits, using a sealer while painting will help protect the surfaces of your painted components and structures. Sealer adds to the cost of the paint materials, but the troubles it prevents make it worth it.
Although buying a sealer coupled with your paints may be quite expensive, the benefits it will provide on your painting jobs will make it worthwhile.
Automotive Sealer
Unlike other sealer types, you get to use an automotive sealer on an automobile and its parts. Using an automotive sealer is a necessity if you look forward to protecting your automobile parts from rust due to factors like air and moisture.
Just like the general sealers, the automotive sealer is designed to absorb shocks from impacts because it is manufactured based on material dynamics. This factor is, therefore, possible for it to adapt to the increase and reduction in the sizes of the bonnet, door, trunk, and other auto parts where you can use it.
Painters in automobile industries use the combination of the automotive sealer with paints while working on the bodies of cars since the point of joining of the chinks and seams are misshaped, it will not tear apart nor will it get removed from the auto body.
If you are new to painting, you do not have to worry because it is relatively easy to apply. With the glossy finish, the automotive sealer provides, your car will always remain distinguished from cars in the car park.
Things to Look Out for Before You Buy a Sealer
Some of the important things to check out before you purchase an automotive sealer are:
- Sealant Type
Knowing the sealant types that exist will guide you in buying the right sealer type for your car. You will always come across two types, namely; acrylic and polymer. If you need the automotive sealer for your personal use, the polymer sealer would be the best choice for industrial or commercial use, you should go for the acrylic sealant.
- Capacity
For polymer sealer, a lower capacity is needed but if you are using the acrylic sealer, your sealant capacity must be larger. The more complex the usage, the larger the sealer capacity that will be required by you.
- Protection Features
Your main aim in purchasing a sealer is because of its function of protection. With an automotive sealer, you can be assured of the prevention or curbing of ultraviolet rays, debris, and other contaminating particles.
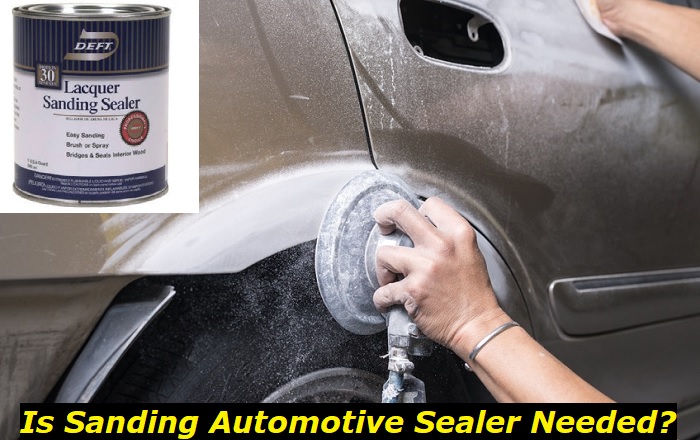
Can You Sand an Automotive Sealer?
So, let’s see if you really need to sand the sealer. A lot of professionals are pretty sure that you have to do it but we disagree. Why?
Because modern sealers are quite like paints. They will form a thin even film and sanding will only spoil them eventually. So, if you apply sealers just like they are to be applied, no sanding is needed.
Please remember that modern sealers need to be applied right before painting, so one hour is the maximum gap between sealing and painting. And you will still need sanding if at least one of these factors is true:
- Your sealer clearly says on the can that you need to sand it before applying any other materials over it.
- The sealer doesn’t form an even film and looks bad, has some orange peel or any other problems with the surface.
- You have left the sealer for more than 2 hours after applying it and before applying paint. You will need to sand it for better adhesion, otherwise the paint may just chip off.
Now let’s see how exactly you should sand the automotive sealer.
Materials Needed for Sanding
Before you go ahead to sand your automotive sealer, ensure you get the following materials:
- Wet/Dry Sanding Pads
- Sanding board
- Auto Body Repair Tools
- Sponges and Squeegees
- A basin
- Sandpaper
- Hand gloves and other safety materials.
How to Sand an Automotive Sealer?
- Wash First
Cleaning your automotive sealer before sanding is the first and foremost thing that you must get done. The washing shouldn’t be done with water but rather with wax and a grease cleanser. This process should never be ignored if you want a perfect finish after sanding.
- Don’t Forget Your Gloves
It is easy to forget to wear your gloves or intentionally not put them on because the surface that requires sanding may be a small one to you. Always bear this in that no surface is too small to put on your gloves.
Your gloves should be always worn if you would not like to treat a poisoned hand after sanding. As much as you look forward to taking care of your automotive sealer, taking care of your body first should be your priority.
Also, failure to wear your gloves will cause specks of dirt like sweat, oil, and other substances on your hands to affect the finishing of your sanded automotive sealer.
- It’s Time to Sand
Based on the type of sanding job required, you can use sandpaper or an electric orbit sander to sand your automotive sealer. Sanding does the job of taking away the foremost layer of your automobile paint.
Answering the question; ‘Why do I want to sand?’ will guide you in the sanding process. Either it is for adhesion if your automotive sealer barely has any damage or it is without adhesion where high grit sandpaper is necessary.
As a newbie in sanding, the best means to get your automotive sealer sanded is the manual method using sandpaper. Ensure you maintain your stroking evenly with your two hands while you sand slowly. By doing this, the paint on the surface of the sealer will peel off smoothly thereby giving you a perfect finish.
Alternatively, you could also go for wet sanding instead of dry sanding to sand your automotive sealer. For this type, water is the lubricant and cleaner needed and while sanding, you shouldn’t go in a circular motion but rather in a straight line. And once you’re done, ensure you wash off the dust away with water.
The materials you’ll need for wet sanding are not so bulky as you can just go for an unused spray bottle which will make it easy for you to add water while sanding.
Safety Considerations
A sanded sealer is poisonous to human health. Thus, you would need an extra measure of carefulness while it is in use. You are very much advised to use it in an environment where there is fresh air.
This harmful substance can easily penetrate through your skin which is the reason your gloves and other safety equipment should be kept at a closer range while painting.
It is a high necessity that you protect your skin because of the harmful substance that is released into the environment from the automotive sealer to prevent transmission of diseases due to the dust from sanding.
Extra Tips for Sanding
For reading to this point, we’ve got some extra tips for you. Do check them out:
- Be very careful and tender while sanding to get it all through to the end without getting a rough surface.
- If a total painting is not necessary, you can go ahead to use 2000-2500 grit wet and dry sandpaper.
- To clear off scratches and pores, place your hands lightly on the portions on the auto parts while sanding.
- Ensure you select the best sandpaper grit based on the texture of the surface that you need to work on.
- Do not rush the sanding process. You will get the best finishing when you take it slowly and make sure you do not add too much force while sanding, just let the sandpaper do the job.
Conclusion
If you’ve been scared of sanding your automotive sealer on your own. We are optimistic that you would be able to confidently sand your sealer on your own from the information provided for you in this article.
So, get your sandpaper ready as you’re about to make your sealer come out with a perfect finish like never before.
- Can You Unmix Paint: Techniques, Consequences, Alternatives - February 23, 2024
- Does Primer Need to be Mixed? Effective Primer Application - February 22, 2024
- How to Make Old Paint Usable Again: Retrieving and Preserving Paint - February 21, 2024