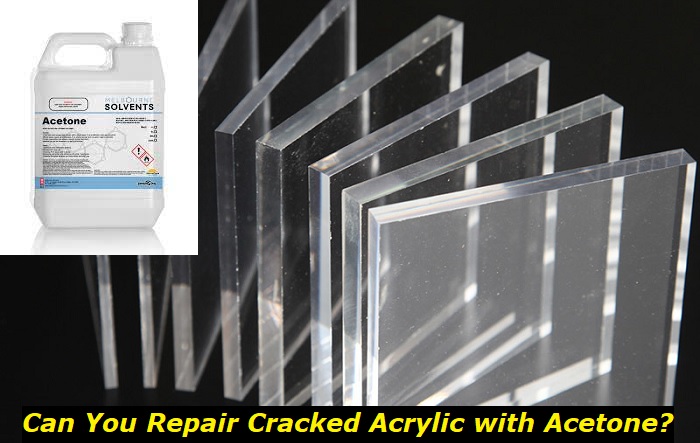
Having cracked acrylic can be frustrating. But can you repair it with acetone? Yes, it’s possible to repair acrylic with acetone.
In this post, we will discuss how to repair cracked acrylic with acetone. So, if you have cracked acrylic and need repair, read on to learn how to quickly and safely fix it with acetone.
What is Acrylic?
Acrylic is a transparent thermoplastic material that is widely used in a variety of applications, such as in making indoor and outdoor signs, frames and display cases, and architectural glazing, among other applications. However, like any material, acrylic can crack over time due to stress or aging.
Notably, when acrylic cracks, you can repair it to restore its functionality and aesthetics. One common method for repairing cracked acrylic is by using acetone. Acetone is a solvent that can dissolve and create a bond between acrylic surfaces when evaporated.
Before proceeding further, let’s look at some of the characteristics of acrylic that make it a popular material and why it’s worth repairing it as soon as you see small cracks appearing. Some of the critical characteristics and properties of acrylic include:
- Acrylic is known for its excellent optical clarity, making it a popular choice for applications that require transparency, such as windows, displays, and signage.
- Acrylic is a durable material that is resistant to impact and weathering. It is less likely to shatter or break than glass, making it a safer option for specific applications.
- Lightweight. Acrylic is a lightweight material making it easier to handle and install, especially in applications where weight is a concern.
- Acrylic is a versatile material easily shaped, molded, and fabricated into various forms. It is adaptable to different design requirements and applications.
- Chemical Resistance.Acrylic is resistant to many chemicals, which makes it suitable for applications that may involve exposure to various chemicals, such as laboratory equipment or chemical processing industries.
- Color and Design Options.Acrylic is available in various color options, including transparent, translucent, and opaque, allowing for different creative design possibilities.
- Thermal Insulation. Acrylic has good thermal insulating properties, making it suitable for applications requiring thermal insulation.
- Acrylic is a recyclable material. The material can be recycled and repurposed into new acrylic products. Therefore, it is an environmentally friendly option for different uses.
Why Use Acetone to Repair Acrylic
Acetone is a colorless, volatile organic compound that dissolves acrylic and creates a bond between the cracked surfaces when it evaporates. This makes it a suitable option for repairing small cracks or gaps in acrylic materials. Why should you opt for it over other materials? The following aspects make acetone preferable for repairing acrylic over other materials.
- The solvent is readily available. You can find it in hardware stores, paint stores, or chemical supply shops.
- Creates a robust and transparent bond. Acetone is commonly used in acrylic repair due to its ability to create a strong and transparent bond without leaving any residue or marks on the surface of the acrylic.
- Fast evaporation rate.Acetone has a fast evaporation rate, which makes it ideal for acrylic repairs as it dries quickly, allowing for efficient and timely repairs.
Materials and Tools Needed
When repairing cracked acrylic with acetone, you will need a few materials and tools. Notably, it’s important to note that the materials and tools needed may vary depending on the size and severity of the crack, as well as the specific repair technique you choose. Therefore, some of the materials or tools may be optional. The following are some of the essential tools and materials you require.
- Acetone
- Clean, soft cloth
- Clamps or weights
- Protective gloves
- Eye protection
- Fine grit Sandpaper (optional)
- Razor blade or acrylic cutter (optional)
Step-by-Step Guide to Repairing Cracked Acrylic with Acetone
The following is a step-by-step guide when repairing acrylic with acetone
1) Clean the Cracked Surfaces
It’s essential to have a clean surface for the acetone to work effectively.
Therefore, start by cleaning the cracked surfaces of the acrylic thoroughly using mild soap and a clean, soft cloth. Remove dirt, debris, or grease from the cracked surface. Also, after cleaning, ensure the surface is dry and moisture-free.
2) Sand the Cracked Surface (if needed)
If the cracked surface of the acrylic is rough or uneven, you need to use fine grit sandpaper to smoothen it. This will help create a better bond between the cracked surfaces. While sanding, be gentle and use light, even strokes, to avoid damaging the acrylic further.
3) Extend the Crack
If the crack is not a straight line, you may need to use a razor blade or acrylic cutter to extend the crack into a straight line carefully. This will help facilitate the repair process and ensure a better bond between the cracked surfaces. Notably, be careful to extend the crack correctly.
4) Apply Acetone
Once the cracked edges are clean, smooth, and straight, apply acetone to the cracked surfaces. You can use a clean cloth to apply the acetone. Importantly, be sure to apply the acetone only to the cracked areas and avoid spreading it on unaffected areas of the acrylic.
5) Hold the Cracked Surfaces Together
Immediately after applying the acetone, carefully align the cracked surfaces of the acrylic and hold them together firmly. Ensure the cracked edges are correctly aligned for a robust and seamless repair. You can use clamps or weights to keep the cracked surfaces in place while the acetone evaporates and the repair sets.
6) Allow Acetone to Evaporate and Repair to Set
Acetone evaporates quickly, usually within a few minutes, but setting requires time. Therefore, allow the acetone to evaporate fully and the repair to set according to the manufacturer’s instructions. This may take several hours or even overnight, depending on the size and severity of the crack.
7) Clean Up and Polish
Once the repair has set, carefully remove any clamps or weights. Clean up any excess acetone using a clean cloth or paper. Lastly, you can use a suitable plastic polishing compound to further smooth and polish the repaired area for a more finished look.
Tips and Precautions When Using Acetone to Repair Acrylic
When repairing cracked acrylic with acetone, it’s essential to follow some tips and precautions to ensure a safe and successful repair process. The followings are some tips and precautions to keep in mind.
- Work in a well-ventilated area
Acetone fumes can be harmful if inhaled. Therefore, always work in a well-ventilated area, preferably outdoors or in a room with open windows or doors. Avoid working in confined spaces or areas with poor ventilation.
- Wear protective gear
Acetone can cause skin irritation, eye irritation, and respiratory discomfort hence taking proper precautions is essential. Mainly, wear appropriate protective gear, such as gloves and safety goggles, to protect your skin, eyes, and respiratory system from contact with acetone or its fumes.
- Use high-quality acetone
Using low-quality or contaminated acetone may result in an unsuccessful repair. Low-quality acetone may not effectively dissolve and bond the acrylic surfaces. Therefore, ensure that you are using high-quality acetone.
- Prepare the cracked surfaces properly
Proper surface preparation is crucial for a successful repair. Thoroughly clean the cracked surfaces of the acrylic. Remove any dirt, debris, or grease. Also, if necessary, sand the edges to smooth them out or extend the crack into a straight line.
- Apply acetone sparingly
Acetone is a strong solvent and can dissolve and damage acrylic material. Therefore, use it sparingly and apply it only on cracked surfaces to prevent further damage. Avoid spreading it on unaffected areas of the acrylic.
- Align and hold the cracked surfaces properly
Align the cracked surfaces of the acrylic carefully and hold them together firmly immediately after applying acetone. Proper alignment and pressure are crucial for a robust and seamless repair.
- Allow sufficient time for the repair to set
Although acetone evaporates quickly, the proper bonding takes longer and requires patience. Mainly, follow the manufacturer’s instructions and allow sufficient time for the repair to set fully before handling or applying any stress to the repaired area.
- Test the repaired acrylic
After the repair has fully set, test the repaired acrylic carefully to ensure that it has regained its strength and integrity.
- Sand and polish carefully
Once the repair has set, carefully sand and polish the repaired area for best results.
Conclusion
Repairing cracked acrylic with acetone is a suitable choice. When appropriately done with careful consideration to surface preparation, proper application techniques, and observing the recommended safety measures, you can quickly restore the integrity and appearance of your cracked acrylic items, extending their lifespan and usefulness.
Lastly, it’s important to note that the success of the repair process mainly depends on the size and severity of the crack, as well as the condition of the acrylic material. It’s important to note that acetone for acrylic repair is typically recommended for small cracks or gaps. Using it on larger or more severe cracks is not adequate. Therefore, in instances where the cracks are large, you require professional repair or replacement.
- Can You Unmix Paint: Techniques, Consequences, Alternatives - February 23, 2024
- Does Primer Need to be Mixed? Effective Primer Application - February 22, 2024
- How to Make Old Paint Usable Again: Retrieving and Preserving Paint - February 21, 2024


