As a homeowner, you might wonder whether certain paints and finishes are compatible with other materials such as wood, metal, or masonry. Among the properties you need to check are the paint’s type (satin, semi-gloss, or gloss) and its finish (polyurethane, varnish, or sealer).
Due to these compatibility issues, it’s customary for manufacturers to label their paint cans with recommended uses. For instance, the manufacturers of gloss and satin paints often feature lists of appropriate finishes. Well, it doesn’t hurt to try. DIYers love to try new things that are not in the books. This article will expose you to what to expect when you apply gloss polyurethane over satin.
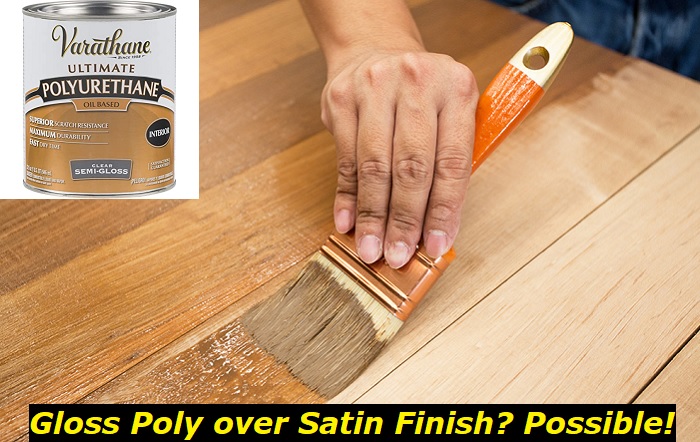
Can you apply gloss poly over satin?
The short answer is yes – with a few caveats. Gloss polyurethane is highly protective and provides a high-shine finish. It’s a great option to protect the wood from water, dirt, and stains.
It’s important to note that the results will vary depending on the paint or stain you’re using. The polyurethane will likely dry with a glossy finish if you’re using water-based paint or stain.
However, the polyurethane will likely dry with a satin finish if you’re using oil-based paint or stain if you’re using oil-based paint or stain. In either case, it’s always best to test the product in a small area before proceeding with the entire project.
What is a satin finish?
The satin finish is generally considered between semi-gloss and low-luster. It’s distinguished by its soft tone and less noticeable sheen. This wood finish comes factory-applied on a lot of mass-produced furniture.
Because the satin finish is less reflective, it doesn’t show dirt and stains as easily. This makes it less labor-intensive to keep the wood in good condition.
Is satin finish waterproof?
The satin finish is “water-resistant” – not completely waterproof. While it can withstand moisture, it’s not recommended for use near water. And downright dangerous to put under water-laden furniture.
Satin finishes are less reflective than gloss finishes and produce a soft shine. These finishes are less noticeable after the paint is applied to the wood. Matte finishes also reduce reflection but produce a softer glow than satin paints.
What is satin poly best used for?
Satin poly is best used for surfaces that need a bit of protection from dirt and grime but don’t require a high-gloss finish. It’s also a good choice for people who want an easy-to-clean surface that won’t show fingerprints or smudges as easily as a glossy finish would. Some examples of where you might use satin poly include:
- kitchen cabinets
- bathroom vanities
- furniture pieces
- trim work
- doors
- molding
Should I seal my satin-finished wood?
If your satin-finished wood is in good condition, you don’t need to apply a sealer or finish. But you may want to seal certain parts of furniture that see a lot of dirt and grime. For example, you may want to seal bathroom furniture that faces constant moisture and humidity.
What is Gloss Polyurethane?
Polyurethane sealers are typically available in gloss, satin, and matte finishes. Gloss finishes are highly reflective and produce a shiny finish on the paint. Gloss polyurethane finishes are striking, but since they reflect the most light, they show every tiny blemish, scrape, and scratch. It’s unusual to see this finish on floors because of this. If used for floors, it should be done in low-traffic areas.
What is gloss polyurethane best used for?
Gloss polyurethane is best used for surfaces that need to be highly durable and easy to clean. It’s also a good choice for people who want a shiny, reflective finish. Some examples of where you might use gloss polyurethane include:
- countertops
- tables
- bar tops
- trim work
- doors
How to prep satin-finished wood for polyurethane
Preparing the wood is the most important step when planning to apply polyurethane over satin. The wood must be free of oils and dirt before sealing it. Use sandpaper to remove dirt and debris. You don’t need to sand the wood down to its raw state. Just rough up the surface a bit. This will allow the polyurethane to bond more easily to the wood before proceeding with the project.
Step by Step procedure for applying gloss poly over satin
- Begin by sanding the surface you’ll be working on. This will help create a smooth surface for the polyurethane to adhere to.
- Next, clean the area with a tack cloth or other lint-free cloth to remove dust from the sanding.
- Once the area is clean, apply a thin layer of gloss polyurethane with a brush or roller.
- Allow the first layer to dry completely before applying the second layer.
- Repeat steps 3-4 until you achieve the desired finish. Remember to sand between each coat for best results.
What result do you get when you put a gloss poly over satin?
The result would be a glossy finish with a somewhat diminished sheen and light reflection compared to applying high gloss alone. The polyurethane will likely dry with a glossy finish if you’re using water-based paint or stain.
The important thing to keep in mind is that if your final coat is glossier than the prior coat, the result will be a final coat that is slightly less glossy. On the other hand, applying less glossy over more glossy results in a top coat that is just a little bit glossier. Just keep in mind that the qualities of the top coat—sheen, shine, etc.—take precedence, so satin over gloss, for instance, does not appear the same as gloss over satin.
However, the polyurethane will likely dry with a satin finish if you’re using oil-based paint or stain. In either case, it’s always best to test the product in a small area before proceeding with the entire project.
What is the best way to seal your wood with polyurethane?
When sealing your wood with polyurethane, it’s important to use thin, even coats and sand between each layer. This will help you achieve the best possible finish. It’s also important to allow each layer to dry completely before applying the next. Follow these steps to get the best results:
- Choose a poly finish that works best for your project. Oil-based poly will hold up better to the elements outdoors than water-based formulations, but it will take much longer to dry and cure. Although it won’t stay as long outside, you can easily remove water-based poly from tools.
- Using a brush or rag, coat the wood with polyurethane. Put the wood on a surface that can absorb polyurethane coating. Apply polyurethane to the wood’s surface with a brush or drench a clean rag before rubbing it around the wood’s face.
- Apply a smooth coat across the whole surface. Using a clean brush or towel, the polyurethane should be smoothed out using long strokes. Work from one side to the other to maintain an even, smooth polyurethane dispersion on the wood’s surface.
- Sand between layers of polyurethane. To remove flaws from the entire surface, use good 400-grit sandpaper. The entire surface should be lightly sanded, but you don’t need to push too hard. Use a rag to clean the surface after sanding to eliminate any dust you may have produced.
- To get your desired finish, treat the surface with polyurethane several times. Wait for each layer of polyurethane to dry completely before applying the next one to the wood’s surface. To balance out any uneven surfaces, sand is in between coats.
Top tips for applying polyurethane
- When sanding, Deeper scratches created by paper with a lower grit number are removed by paper with a higher grit number.
- The majority of tasks require sanding with medium sandpaper (100-grit), next fine sandpaper (150-grit), and finally, extra-fine sandpaper (220-grit).
- Utilize a shop vacuum with a soft brush attachment, then clean everything with a dry, lint-free cloth dipped in mineral spirits.
- Use a tack cloth to clean the surface after the final dusting.
- Place the ingredients in a glass jar and whisk the mixture slowly using a flat stir stick.
- You should never shake polyurethane cans! You’ll add air bubbles to the mixture, which will cause bumps to appear on the completed surface.
- Apply oil-based polyurethane using a natural bristle brush of high grade. Air bubbles may be introduced into the finish by synthetic brushes with exploded tips (where each strand is split into numerous strands at the tip).
- It would help if you did not touch the can’s rim with the brush, which could cause air bubbles.
- Use just enough to get a beautiful, even coat without dry spots; avoid using too much to prevent runs. Once the surface has been coated, go over it again in the grain’s direction.
- To avoid burning through the delicate finish, use just enough water to moisten the sandpaper. Just enough sand will cover the imperfection.
Final Words
Gloss polyurethane over satin is not a bad idea. It’s important to note that the results will vary depending on your paint or stain. In either case, it’s always best to test the product in a small area before proceeding with the entire project.
- Can You Unmix Paint: Techniques, Consequences, Alternatives - February 23, 2024
- Does Primer Need to be Mixed? Effective Primer Application - February 22, 2024
- How to Make Old Paint Usable Again: Retrieving and Preserving Paint - February 21, 2024


