Yes, you can plane epoxy resin. Even while fully cured epoxy is as tough as knots on blades, it may be easily planed, joined, sawn, and sanded. Epoxies are not usually planed because they react poorly to the heat and friction created by power tools. They will either soften or melt if you cannot keep things cool while working with them.
Epoxy resins are most commonly used in laminating applications because they require a more delicate touch and must be applied evenly to get a high-quality coating and smooth finish. Although cheaper and less fragile thermoplastics can be used for this purpose, epoxy resin is usually the material used because it has better adhesion and a little more strength.
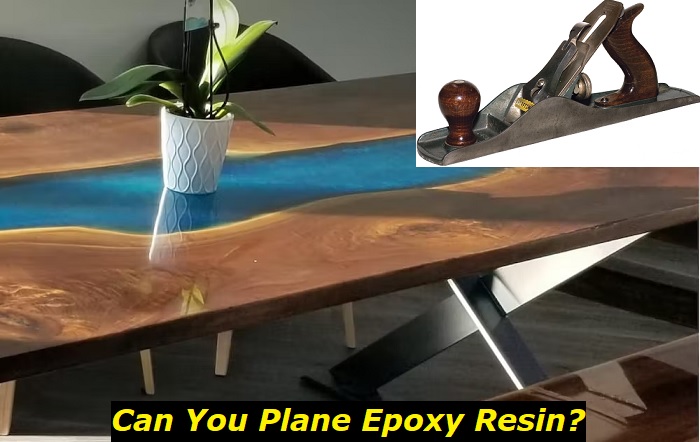
What is epoxy resin?
Epoxy is a strong, durable glue that dries hard and clear but can be brittle. It’s used in everything from artwork to boat building and is beloved for being waterproof, heat resistant, and super strong. Like most glue, you must apply it to both surfaces that will stick together.
This two-part glue and hardener combination is useful for more than just sporadic repairs. For the most difficult work, you may use it as an adhesive, filler, wood stabilizer, or finish. It will bind practically any material, cures as hard as a stone without shrinking, is extraordinarily strong, and is resistant to chemicals and water.
Of course, it also has disadvantages: the uncured substance can cause skin sensitization and is rather pricey. Additionally, since cured epoxy is irreversible, it is not a sensible choice of glue for furniture that may eventually need to be disassembled and repaired.
How can you plane epoxy resin?
Epoxy resin can be challenging to work with, but with the right tools and a little practice, it can be easy to get great results. One of the most important things is how to plane epoxy resin. This process will help create a smooth, level surface perfect for finishing.
Start by sanding the surface of the resin with coarse-grit sandpaper. This will help to create a rougher surface for the plane to grip. Next, use a block plane or hand plane to gradually shave off the rough edges. Be sure to move slowly and evenly to avoid creating divots or unevenness on the surface. If necessary, finish up by sanding the surface with fine-grit sandpaper until it is completely smooth. With a little practice, you’ll be an expert at planing epoxy resin in no time.
However, it is agreed that using a large, flat piece of steel or a large wooden board with coarse paper is the best solution. Using wax or butter soap as lubrication is also suggested to not scratch the surface. If you’re not careful when doing this, you can chip the resin layer and damage your finish because it is somewhat soft if it hasn’t fully cured.
It’s also important to know that you should fix any defects in the epoxy coating before you plane and even sand the surface. It’s a lot easier and safer to fix flaws in your finish before finishing rather than after it’s applied (and this way, you don’t have to worry about sanding or planing over them). Besides, for it to work properly, this procedure requires that your sealant or epoxy resin has fully cured. Three days is usually long enough.
Where is the best place to use epoxy resin?
Unfortunately, there isn’t a single answer to this question. The choice largely depends on various factors such as the kind of finish applied to the surface, how you will use it, and its intended purpose.
The general rule is that any place in direct contact with moisture will be affected by moisture, such as underneath all sorts of sinks, showers, and baths or around leaky faucets and pipes. But this also varies from person to person because we all have different priorities about what it’s important for our house or business.
So how do you know if your surfaces are affected by moisture? Here are some scenarios to consider:
- Shower and bath, sinks, faucets in kitchens and bathrooms.
- Floors: Carpet, hardwood, and laminate.
- Windowsills, frames, doors, and hardware are frequently exposed to the elements.
- Sheds and garages: Any structure that might be exposed to moisture, such as rain or snow.
Epoxies can be used to treat any of the above surfaces or places because they are easy to apply with a brush, roller, or sprayer. This is different from sealants most commonly used on wood and flooring surfaces. They are more prone to cracking and may not bond well to some materials, such as tile or concrete.
Step by Step Guide on How to Plane an Epoxy
Epoxy is a tough, durable material often used to coat surfaces and protect them from damage. When you are working with epoxy, it is important to use the right tools and follow the proper steps to ensure a smooth, even finish. Here is a step-by-step guide on how to plane an epoxy surface:
- Step One: Check the Air Temperature
The first thing you should do to ensure the job is done right is to check the air temperature. The epoxy resin has a temperature range in which it’s best used, and any lower or higher temperature can damage the finish. Most woodworkers recommend that the outside weather should be between 60°F and 90°F. If it’s hotter, it’s best to wait until it cools off because you’re more likely to damage your surface than improve it when it gets too hot outside.
Similarly, if the temperature is too cold, then you’re running the risk of damaging the surface while planing it. And this is especially true if it’s below freezing because your epoxy resin might become brittle and crack or chip off the surface.
- Step Two: Get Your Tools Together
If you want to do it correctly, you should ensure that your tools are first-rate in quality. One thing for certain is not to use dull or cheap tools when working with epoxies because they’re sensitive to scratches and damage. As a result, you’ll waste your time and effort trying to fix it only to realize that you should have just gotten the right tools.
Besides, it is recommended that the plane or scraper you intend to use is made from aluminum and has a hardwood handle. These can be found at an average home improvement store or your local hardware store. A rubber mallet or a piece of hardwood board also makes for a good tool for knocking off any large pieces of debris from your plane or scraper, so you don’t have to worry about damaging your surface when doing this.
- Step Three: Sand the Surface
Start by sanding the surface with medium-grit sandpaper. Then, move on to finer grits until the surface is smooth. Be sure to dust off the area after each sanding. This will help to create a rough surface for the epoxy to adhere to.
- Step Four: Apply the Epoxy Resin
Next, apply a layer of epoxy to the surface using a roller or brush. Next, it’s time to apply a layer of epoxy to the surface using a roller or brush. This will help to create a strong, durable bond. Be sure to work in small sections so that the epoxy does not begin to set before you can spread it evenly and smoothly.
- Step Five: Plane the Epoxy
Once the epoxy has been applied, use a hand-held power planer to smooth the surface. Move the planer in long, even strokes until the entire surface is evenly smoothed. Apply gentle pressure as you move the tool back and forth until the surface is nice and even.
- Step Six: Allow it to Cure
Finally, allow the epoxy to set for the recommended amount of time before removing any excess material with a putty knife or sandpaper. Once the epoxy has been completely set, your surface will be protected from wear and tear. Ensure you allow enough time to cure.
Conclusion
So, can you plane epoxy resin? The answer is both yes and no. You can plane it if you take the right precautions, but it’s not a job for the faint of heart. Fortunately, epoxy coatings are among the best adhesives and are extremely resistant to most chemicals, including acids.
So you can expect that an attempt to plane the epoxy may either go well, depending on how much care is taken. Though your surface may get damaged due to wear and tear or weather factors, your epoxy coating will probably stay intact for many years.
If you have experience planing wood, then you should get the hang of planing epoxy with a little practice. But before you try, read up on how others have done it successfully. Share your experiences in the comments section so we can all learn from one another!
- Can You Unmix Paint: Techniques, Consequences, Alternatives - February 23, 2024
- Does Primer Need to be Mixed? Effective Primer Application - February 22, 2024
- How to Make Old Paint Usable Again: Retrieving and Preserving Paint - February 21, 2024
