Woodworking is one of the most prestigious crafts humans have created throughout history. Whilst the creating process is the most important, for the work to look finished and be protected, many craftsmen use staining as a closing procedure.
Wood stains are products usually made from liquids or gels, destined to color and protect the wood. They could vary in type but all must include a coloring agent. The coloring agent is suspended or dissolved in a “carrier” substance also known as a solvent. The solvent can be water, alcohol, oil, or polyurethane.
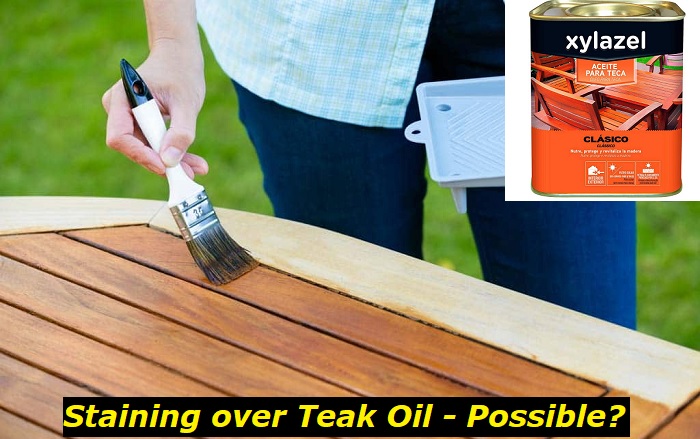
But what happens when you decide to stain over a piece of wood that has previously been covered in teak oil?
In this article, you will learn:
- What teak oil is and how it’s used
- What to use as stains when the wood has been previously finished with teak oil
- Techniques for applying gel stains
What is teak oil?
To answer these questions, we have to first dive into what teak oil is and where it’s used.
Teak oil is composed of a bundle of ingredients, each of them designed to slow down the natural graying process of wood whilst also protecting it from weathering.
Can you stain over teak oil?
As aforementioned, typical stains are used on the surface of wood to change the lumber’s color. In order to do so, it needs to seep into the wood. So, when the wood has been finished with another type of coat, such as with teak oil, before the staining process it is difficult for the stain to adhere. That is because these oil finishes cure and harden, forming a protective barrier.
The protective barrier prevents anything from getting into the grain, such as water or chemicals because it can cause it to rot. Hence, it’s pretty clear that natural stains can’t penetrate teak oil finishes.
But before you lose all hope, you’ll be glad to know that because of daily discoveries in chemical engineering, alternatives have been made for this particular case.
Alternatives for staining over teak oil
As researched, the option with the best-perceived results is staining the previously finished wood with gel stains. Gel stains are the chosen component because they contain urethane, a substance that allows the gel stains to finish teak oiled wood. Before applying the gel stain, essentially, you have to prepare the existing finish from the teak oil by cleaning it well.
To clean the surface, you’ll need a mixture of 50% water and 50% alcohol. This solution besides being used to clean also prepares the teak oil finish for adhesion to the gel stain. That is of key importance because without adhesion the gel stain simply won’t stick to the area.
To get rid of any residue, you can use a sanding pad or a simple cloth to scrub the surface. If you want an even better effect, you should use a sanding sponge for further scrubbing.
Now that the previous surface is prepared let’s delve into the 4 best ways to stain with gel stains over teak oil finishes.
1. Apply On, Wipe Off Method
It is expected that if you’re doing this for the first time, it will seem like something really difficult to do. But you should take your time and not give up before even starting.
Firstly, choose a side that you want to stain on the item. For a stronger start, and a confidence builder you should start on the back of the object first which gives you a little practice and gives you the ability to perfect the technique. The gel stains can be applied with a brush, cloth, or pad. Then wipe off the excess with some cloth that has T-shirt material.
It would be better if you start at the edges of the wood object so as not to cause any distortions.
If the wiping process is causing you trouble, you should work on smaller sections first until you get the gist of it. Try not to over-wipe it, because the less gel is left on the surface the less color the wood will take. That means the desired color won’t be achieved
Check that all the edges and areas are evenly coated and lay the object down to dry.
When you’ve finished one side, leave it to dry for a couple of days. When it has dried, flip it and start staining the other side. The preferred surface is cardboard or plastic as it also stains and could ruin it. Before letting it dry, you need to make sure all fingerprints are evened out.
The most crucial step of this process is the drying time. This time will be longer if it’s cold or rainy; that is normal. If you notice that the color is being removed whilst you add a secondary layer, you have to stop. Let the coat dry up for another few days and then go on. It’s always better to wait longer than ruin the whole process.
After you’re sure that the first coat has dried, you can start applying the second coat to give the surface more depth. Brush on the coat and then wipe off the excess again with an old T-shirt, or you could brush over the whole area multiple times to even out the surface. Several coats of the gel stain can be used as for your preference but remember to always let the surface fully dry in between coats.
If for any reason you need to wipe off the stain in unwanted areas, wet a brush or a rag in mineral spirits. You should be quick on your feet and remove the gel while it’s still wet. If it’s dry and you need to remove it, you can always sand it back.
2. To Wipe Stains On
For this method, you only need some sort of material that is suitable for wiping. As recommended before, an old T-shirt is ideal because the material allows deep penetration and it won’t cause any unwanted stains in the material. Cover the T-shirt with the gel stain first, then apply it onto the surface whilst moving your hands in a circular motion. This motion will make it possible for the stain to soak into the grain.
This technique is usually done if you only need to add a slight color to areas that have previously been thoroughly stained but have since been damaged.
In this method the drying period is crucial. You should let the items dry for at least 24 hours up to 48 hours. After this period, you could add a second coat and so on, until you’ve received the results you’re looking for.
3. Brushing Stain On
If you want a darker look, you could brush the stain on from the first coat using these 2 techniques.
- The first method is also called dry brushing. This method involves brushing the stain sparingly, never soaking the brush fully in the stain. Wipe off any excess on rags or cloths.
- The second method is the opposite of dry brushing. You should brush the stain heavily with brushes that have bristles or foam. After that, get another dry brush and brush the surface parallel to the grain’s pattern.
After you’re done with either one of those techniques, to avoid any blotches on the surface, you can blend out the areas you’ve stained. For blending, you can use a pad, but be sure to do it while the stains haven’t dried fully OR dried too much.
How long you should leave the item to dry, depends on what technique is used. For light brushing, the advised drying time is 24 hours, whilst for heavier brushing, you should let the item dry for 48 hours.
4. How to Dry Pad Stain to Blend
For this, you’ll need to form a pad, as mentioned in the previous text. All you need is an old T-shirt. Cut a small surface from the material and scrunch it into a sphere. Get another piece from the shirt and add it to the top.
Then dab the stained area so you’ll blend and smooth out heavy lines.
If you’re staining items that are used frequently like tabletops, bathroom vanities, or kitchen cupboards that need more protection against water or scratch resistance, you should apply more coats of gel stains to make the items water or chemical-resistant.
There are dozens of ways to use gel stains, there is no right or wrong way to do it. Choose your preferred technique and perfect it, and it’ll always give you the desired results.
Final Thoughts
Though general stains don’t work on teak oil-finished woods, there are alternatives that you can use, such as gel stains. They can help you achieve the desired look of the wood objects you want to stain into darker colors.
- Can You Unmix Paint: Techniques, Consequences, Alternatives - February 23, 2024
- Does Primer Need to be Mixed? Effective Primer Application - February 22, 2024
- How to Make Old Paint Usable Again: Retrieving and Preserving Paint - February 21, 2024


